PrivateServer appliance provides you a backup/restore engine.
3.1.1 Backups
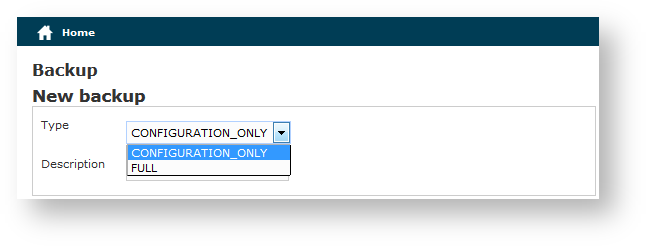
The above figure 1. Backup form shows you the backup form. To archive a backup you must choose from the Type drop-down menu which data to save:
- FULL: this is a complete backup of PrivateServer installation. Useful to restore the current state on a new machine. Backup size could be relevant, depending on data retention configuration.
- CONFIGURATION_ONLY: only operational configuration is backed up. All historical data (CDR, SIP sessions, etc...) are excluded. This is useful for frequent backup, even daily.
Then you are required to fill the description field. The backup will be shown with its creation date.
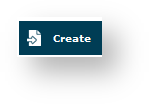
After you're ready, just press the create button:
The process starts immediately and a progress number is shown as follows:
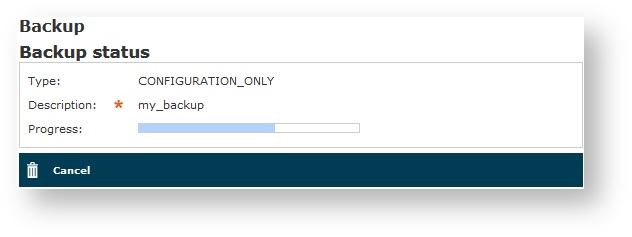
The operation can last a while, depending by the backup type you chose and the amount of data records.
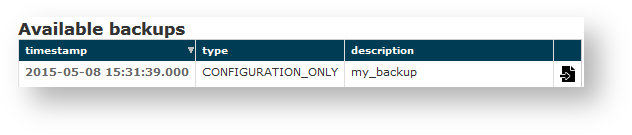
After the backup is finished you can see it listed in the Available backups.
3.1.1.1 Private Key backup
Private Key management has its own rules due to high sensitivity of the information it deals with. As a matter of fact whoever has direct access to the private key must not have direct access to its content unless necessary, because he can else seriously compromise PrivateServer integrity. There are two risks:
- private key file is generated on a dedicated machine and could be leaked or copied during its transfer
- private key file is shown on console and an unauthorized user can get access to it, in case of wrong profile configuration
That's why keypair generation is automatic and there's no direct access to such sensitive informations.
For the same reasons even Full backup does not include private key, which needs to be managed alone. Actually Private Key backup is available only via SSH as user ephone.
After you logged into PrivateServer , command line script can be used to export keypair:
[ephone@xxx ]$ sudo /data/bin/private_key_backup.sh <keypair description>
You will be prompted to input a password to protect the keypair, which is going to be exported in PKCS12 format and it will be found in the following archive: /home/ephone/<keypair description>.tar
<keypair description> is the "description field" shown in web console when accessing key pair view
3.1.2 Restores
If you want to restore from a backup, select it from the backups list.
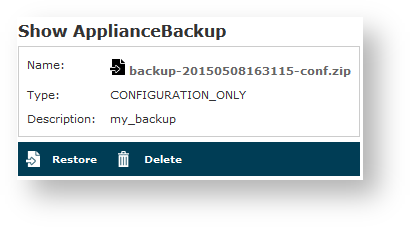
From the Show ApplianceBackup you can decide if Delete or Restore the archive. Let's go for restoring it.
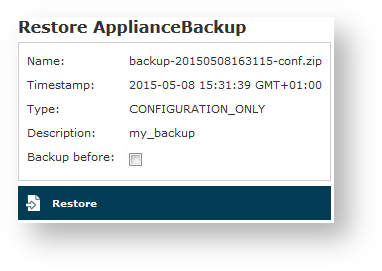
After you click on the Restore button you get the summary shown in figure 6. The Restore Form. If you choose the Backup before then you let the server perform an Emergency backup before restoring. This new backup will be listed in the backups list as Emergency.

Click on the Restore button and confirm in the pop up window: the Management console will inform you the services are going to be restarted and you'll be automatically log out. After you log in again, you find the restored backup is disappeared from the backups list.
3.1.2.1 Private Key restore
For the same reasons explained above this feature is available only via SSH as user ephone.
After you logged into PrivateServer , command line script can be used to import keypair:
[ephone@xxx ]$ sudo /data/bin/private_key_restore.sh <pathfile>
You will be prompted to input a password to decrypt the keypair, imported in PKCS12 format and included in the TAR archive. At the end of the import you will be prompted to restart WebConsole through the command:
pcs resource restart WebConsole
If you need to restore your Private Key on a different server, which is a most possible scenario, then you have first to copy your backuped private key on it. You can use scp command and user ephone.
3.1.3 Delete Backups
If otherwise you choose to press the Delete button and thus erase the archive, the you get a confirmation pop-up windows and then the list of available backups is show with a warning message as shown below:
