PrivateWave
Quick Start Guide for BlackBerry 10
This guide provides you easy step-by-step instructions to help you get started with PrivateWave .
Secure calls with PrivateWave
Calling with PrivateWave is a very easy task. You can both use your contact list or directly dial a number using the dialpad.
To make a secure call, you and the called party must have PrivateWave software running on the mobile device, be connected to the Internet and to the same PrivateServer .

Calling by contact list
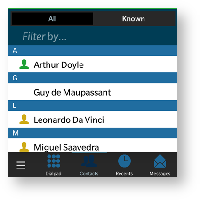
As you can see in figure 2. you address book is shared with the application each contact can show a coloured ball at its left, or nothing at all. These are status marker and they represent the Presence Status for each contact.
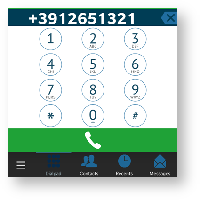
Calling by keyboard
You can make a secure call to any arbitrary number (presuming that the call peer has PrivateWave connected) by simply entering the number on PrivateWave main menu and pressing the dial button.
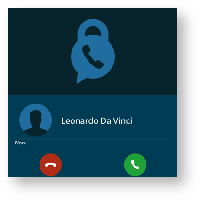
Receiving a secure call with PrivateWave
Once PrivateWave is installed and all the settings are correctly configured on your device, you are able to receive a secure call. PrivateWave displays a screen when an incoming secure call is arrives to your phone. Press the Accept (green) button to allow the connection. After the system have exchanged and verified the security keys the you can start the conversation.
To receive a secure call PrivateWave has to be running and be connected to the Internet.
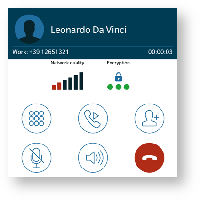
Call status
To establish a call PrivateWave completes three phases shown by three icons:
Call status icons
| Red light | Starting the connection | Connection not yet established. This step may take several seconds |
| Green light | Secure call established | Connection established and secure. You can now speak securely |


Checking your security
A PrivateWave call is always encrypted. The call is automatically secured during the call setup. As soon as the call is established you can immediately start to talk securely with your call peer.
The security of the call is based on a digital certificate verification on the SIP/TLS server. If a certificate error appears check whether the date of your phone is correct. If the date is correct it is possible that the certificate is wrong, misconfigured or expired or that your phone is undergoing a security attack. In these cases always contact your system administrator.
History
Every event performed or received on your PrivateWave is listed into the "History" view, which can be displayed by selecting "Recent" item in the Main view.
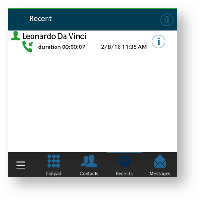
figure 6. recent event list
|

figure 7. Event detail icon
|
Each event has a detail icon (the (i) at that ends of each event line shown in figure 7. Event detail icon).
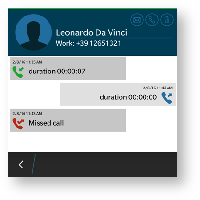
You can access event's details by tapping on the (i) icon and thus have access to all the call events for the event listed in the call history (figure 8. event detail).