In this section we collect all the logs about events that has happened. This type of logs are written once the event has finished and do not represent a live photograph of the state of the service or of the appliance. They are mostly useful for debugging user's issues and to provide support.

As you can see in figure 1. the static logs menu all these logs are grouped under the "LOGGING" label into the main menu.
4.0.1.1 Auditing
The Auditing page shows any change to the configuration performed via web console.
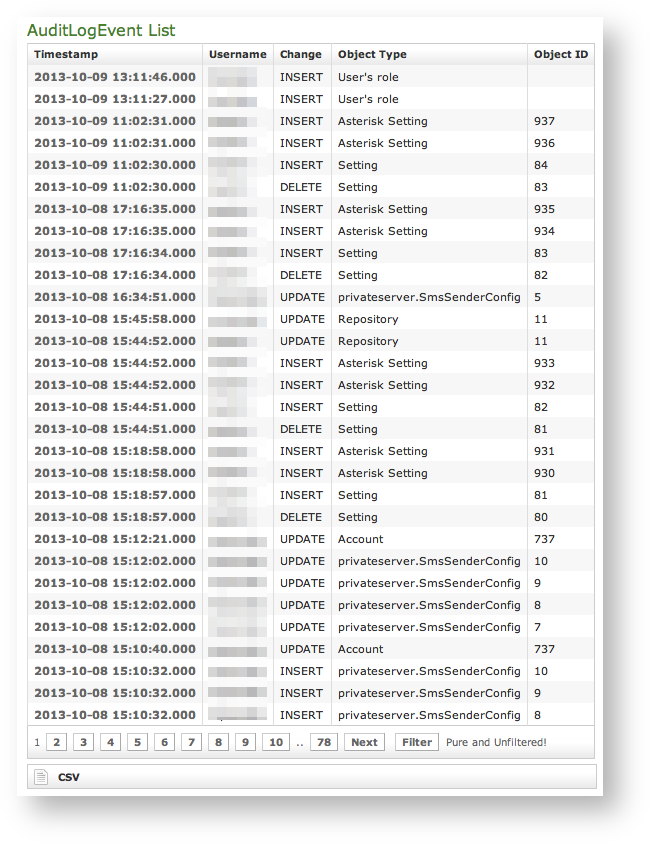
As shown above in figure 2. List of Audit Events Log List, we can collect several informations:
Timestamp: the exact time the event happened.
Please remember that the timestamp is related to the appliance's time configuration. It's local time which gets reported.
- Username: the user who performed the change is traced by the username used in the login.
- Change: the type of changes performed.
- Object Type
- Object ID
These informations can be used for security checks as for post-issue analysis.
4.0.1.2 Web Sessions
In the web sessions it's possible to read the list of all the access made to the web console.
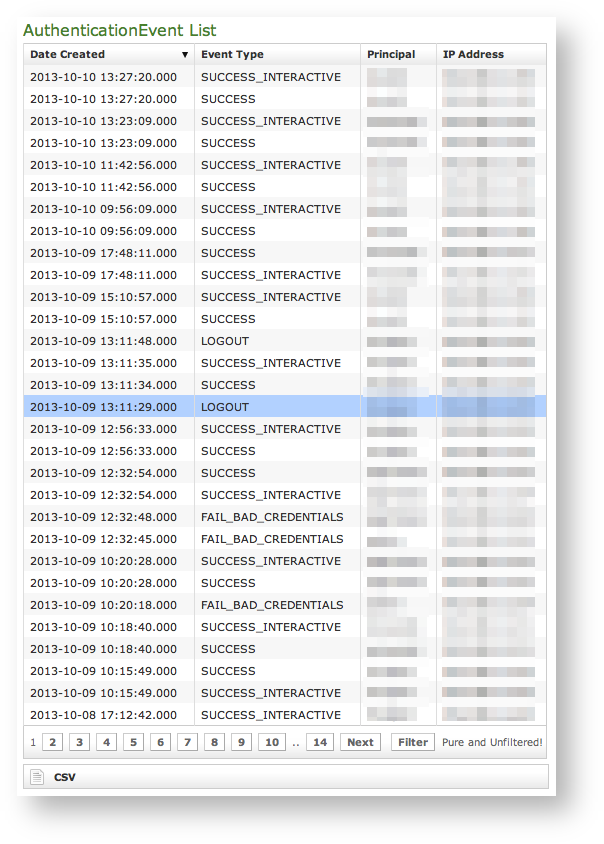
Just click on the Web Sessions entry in the main menu and you get a list as in figure figure 3. List of Web Session Logs. Fields shown are:
- Date Created: this is when the event occurred
- Event Type: there are several type of Events (see specifications below)
- Principal: the username used to log in.
- IP Address: the IP address from which the connection has been performed.
If the user listed is "anonymousUser" then this is an event triggered by the system. This is specifically true for events like the "SESSION_TIMEOUT".
Event Types
Here follows a list of all the event types logged in this table:
- SESSION_TIMEOUT : pretty self explanatory
- LOGOUT : The user performed a logout
- SUCCESS_INTERACTIVE / SUCCESS : these two events always come together and indicates a login has successfully performed. The former one points out the login happened through the web interface ("interactive"), the latter is a generic successful login log.
- FAIL_USER_NOT_FOUND : the login used was not found among the users configured.
- FAIL_CREDENTIALS_EXPIRED : the password or the credentials used are set as expired
- FAIL_BAD_CREDENTIALS : wrong password
4.0.1.3 Call Detailed Records
Despite its name the CDR is a debugging and quality assurance facility. It saves all the calls status, meaning it is very useful to understand is something is going wrong with you Secure Call Service.
To access the CDR you must click on the Call Detailed Record in the main menu. You'll get the "Cdr List" page which includes all the calls recorded.

If the table is empty, please place a phone call between the two SIp Accounts. Then come back on this page and check that the call has been correctly registered. The shown fields are:
- Call Date: when the call has been placed.
- Caller Number: The virtual phone number used to place the call.
- Caller: The caller description, if any.
- Caller Group: The caller's group description, if any.
- Callee Number: The virtual phone number called.
- Callee: The callee description, if any.
- Callee Group: The callee's group description, if any.
- Total Duration: how long the call lasted. Time elapsed from the moment the "Call Button" is pressed on the caller's client to the one in which the communication is closed at all.
- Call Duration: how long the call lasted, just the voice.
- Disposition: which result the call had.
- Hangup Cause: how long the call lasted.
- Call id: a unique number that identifies the call.
- Call type: nature of the call performed.
- Call route: if the call transited on a trunk this field would shown the trunk's name.
Relevant fields in CDR
The Disposition is very important because it tells you the exit code of each call. Possible codes are:
- ANSWERED: the call was taken by the callee
- NO_ANSWER: nobody picked up the phone to answer (mostly this is a time out code)
- BUSY: the callee refused the call
- FAILED: for some reason the call was not able to be placed
- NO_ROUTE_DESTINATION: The callee is not reachable because of network issues.
- NORMAL_CLEARING: Call closed normally.
- USER_BUSY: The user is busy.
- NO_ANSWER: The callee didn't answer and the call was closed for timeout reason.
- CALL_REJECTED: The callee rejected the call, as by pressing the "hold" button.
- BEARERCAPABILITY_NOTAVAIL: The caller and the callee were using different security models that are not compatible.
- NO_USER_RESPONSE: The same as in "NO_ANSWER", but this happens when the call goes out by Trunk.
- CALL: Usual call between two persons
- 3-WAY: Usual call (as above) with an added person during the call
- CONFERENCE: Conference call
- TRANSFER: Usual call that is transferred to a third person
It's possible to avoid any call record, as a Privacy option. To enable the "No-CDR" option, you just have to set the CDR Period to "DAY" and the duration to '0' (zero).
The above statement about the CDR Privacy option is true only for the DIRECT calls (which are the calls between two users). Conferences and 3-way calls will be logged as ever, though.
4.0.1.4 SIP Sessions
The SIP Sessions page show the activities each Account did with the server.
To get this list just click on the SIP Sessions entry in the main menu. The activities are listed by date and they give you a detailed overview of the SIP status for each one. These logs are very useful for debugging the networking issues on the client side.
The Event column lists the SIP events:
- CONNECT: PrivateGSM client opened a connection to PrivateServer. This usually means the client has been activated
- REGISTER: The Account has been correctly registered and is now on line
- UNREGISTER: The Account has been correctly unregistered and is now off line
- DISCONNECT: PrivateGSM client closed the connection. This usually means the client has been stopped.
4.0.1.5 App log configuration
As the web interface is made from a Java application in Tomcat, then you can set the logging levels that are going to be written in the catalina.out log file.
This is an advanced feature usually useful only for debugging purposes. It's not recommended to change the default settings.

In order to change a log level you have first to select a component of the appliance from the left drop-down menu (please check the figure 6. Set Logging levels). Then you can set a logging level from the right drop-down menu.
When you're done just press the Submit button and the catalina.out log file would change its log level accordingly.
4.0.1.6 Install messages
NEW FEATURE!
This log is available starting with the current version of PrivateServer.
Install messages are one amongst the numerous means for installing PrivateGSM on the customers' mobile device.
To make the Install messages work fine you have to configure the Application download URL.
What we accomplish sending an Installation message is to help the customer to find out the correct edition of PrivateGSM application (either Professional or Enterprise) and automatically install it.
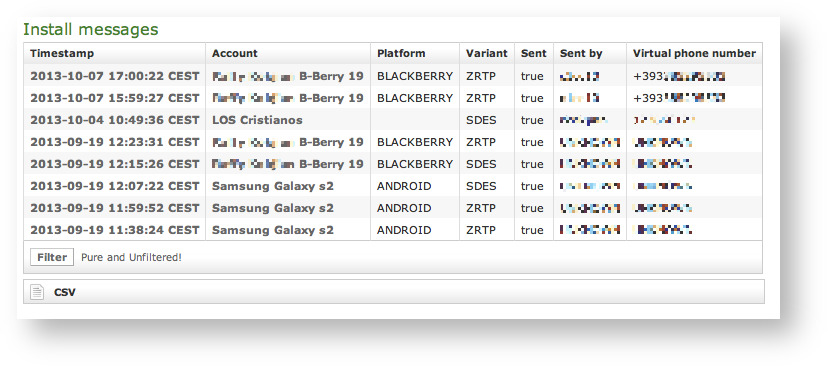
main features of the logs of the install messages are:
- Timestamp: the exact date & time when the message has been sent
- Account: to who the message has been sent to
- Platform: which mobile platform
- Variant: this could be either:
- ZRTP: this is the Professional Edition
- SDES: this is the Enterprise Edition
- Sent: if the message results to be effectively sent or if there were issues in sending it
- Sent by: the User who sent the Install Message.
- Virtual phone number: the number of the mobile device where the text has been sent to
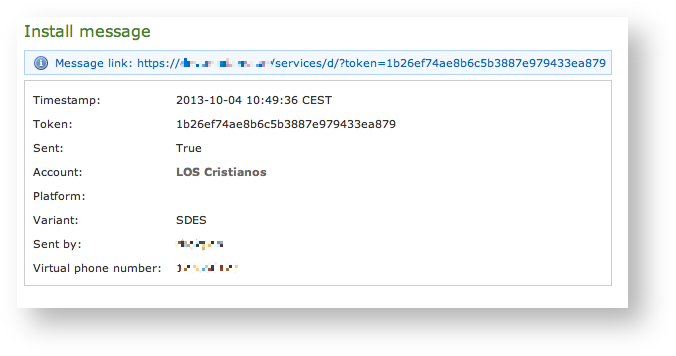
Clicking on the Timestamp field it becomes possible to reveal details about each message. You can have an example in figure 8. details of one install message.
Tip
Clicking on the Account field brings you straight to the Account's detail.
The most important one among them is no doubt the Message link. That's because it's possible to use it in order to create a message to be sent by other means. This composed message would have the same validity of any text message sent to deliver an Install Message to the user.
Tip
An example of a good use of this field in the day-by-day business is copying it into an email and sent it to the user, asking him to open the email on his mobile and then click on the link inside the email. In this way you has a service manager would have a perfect replacement for the text message as a mean for delivering the Install Message.
4.0.1.7 Provisioning messages
NEW FEATURE!
This log is available starting with the current version of PrivateServer.
Provisioning messages are basically the mean for delivering the download URI of the provisioned configuration. Long story short: whenever you push an automatic activation by sending the provisioning message you're sending a text message that contains the URI to the user's configuration. Part of this configuration is created by the Provisioning Profile, part of it is taken by the Account configuration. Nevertheless, it's always a configuration file to be downloaded and then installed in your PrivateGSM.
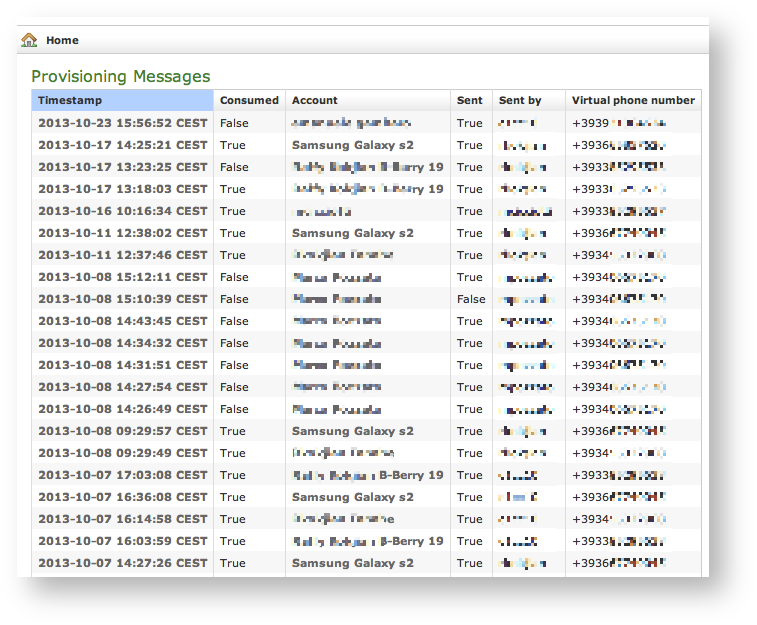
Clicking on the Provisioning Messages link brings you to the logs list shown in figure 9. Log list of the provisioning messages. Here you have all the primary informations about the automatic activation performed:
- the User who sent each provisioning message
- the timestamp pointing out when each message has been sent
- the Virtual phone number where the message has been sent to
- the status of the message: either it's been Consumed or not. This means if the customer has ever clicked on the link inside the text message
- the Account to which the message has been sent to
- if the text message has been Sent or not, meaning if any problem arose during the delivery and the text never left the server.
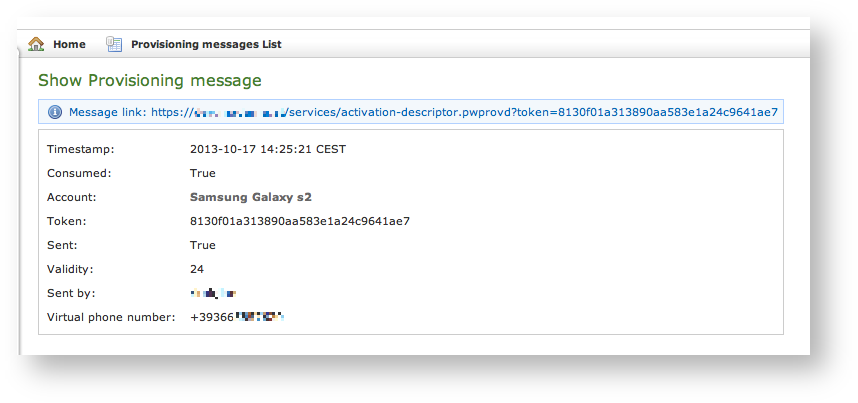
Clicking on the Timestamp field it becomes possible to reveal details about each message. You can have an example in figure 10. detail of provisioning message.
Tip
Clicking on the Account field brings you straight to the Account's detail.
Three are the contents shown in the detail form that are not present in the list above:
- The Message link
- The Token
- The Validity
The most important one among them is no doubt the Message link. That's because it's possible to use it in order to create a message to be sent by other means. This composed message would have the same validity of any text message sent to deliver a provisioning profile to the user.
Tip
An example of a good use of this field in the day-by-day business is copying it into an email and sent it to the user, asking him to open the email on his mobile and then click on the link inside the email. In this way you has a service manager would have a perfect replacement for the text message as a mean for delivering the Provisioning Profile.