PrivateGSM Professional
Quick Start Guide for iPhone
This guide provides you easy step-by-step instructions to help you get started with PrivateGSM Professional.
Making a secure call with PrivateGSM
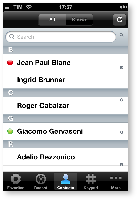
Calling with PrivateGSM is very easy. Select Contacts tab from the tab bar, tap on the contact you want to call and select the contact number associated with PrivateGSM.
To make a secure call, you and the called party must have PrivateGSM software running on the mobile device, be connected to the Internet and to the same SIP server.
The Presence avoid users to call contacts who are not reachable, eg: because they do not have PrivateGSM activated and/or connected. The main value of this feature is to improve user experience suggesting the possible outcome of a call. The contact is not reachable using a full secure call, but you can call him using the unsecure Sip Trunk configured on your server. Enterprise version only! Presence
Contacts lists
Contact status

Online The contact is reachable. You can make a secure call to the user. 
Offline The contact is not reachable, because is not under network coverage or is offline. You can try to make a secure call but the call will likely fail 
Warning 
Error There is a comunication error between your phone and the server. The contact status is unknown, anyway you can try to make a secure call
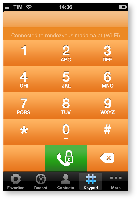
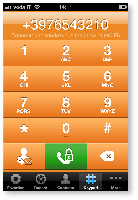
You can make a secure call to any arbitrary number (presuming that the call peer has PrivateGSM connected) from PrivateGSM menu by simply entering the number with the on-screen keypad and pressing the dial (green) button.
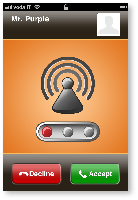
Receiving a secure call with PrivateGSM
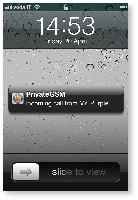
Once PrivateGSM is installed and all the settings are correctly configured on your device you are able to receive a secure call. When a secure call arrives to your device a notification bar will be shown on the top of the screen. Tap on the notification to bring the application in foreground, then answer or decline the call from the application. After the system have exchanged and verified the security keys the you can start the conversation.
To receive a secure call PrivateGSM has to be running and be connected to the Internet.
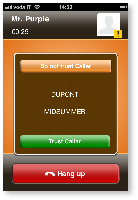
To establish a call PrivateGSM completes three phases shown by three icons: Red light Starting the connection Connection not yet established. This step may take several seconds Yellow light ZRTP-edition ONLY Key exchange Connection established but encryption keys are being exchanged. Green light Secure call established Connection established and secure. You can now speak securelyCall status
Call status icons


Checking your security
A PrivateGSM phone call is always encrypted. To check that nobody is intercepting the call, you must verify the security verification words with you remote party. After the call has been connected PrivateGSM displays the same two security verification words on the screen to both parties. If both of you and your contact see the same security verification words then the call is secure. The security verification words are different each time you make or receive a secure call. If the words are not the same hang up the call immediately as this may be a sign of a security attack..

Inviting your contacts
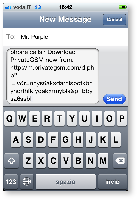
Using your address book you can invite your contacts to join PrivateGSM. Tap on invite button in the bottom left corner of the virtual keypad and choose the contact to you want to invite. The application will create a text message and after your confirmation will send it to the selected phone number. The receiver will only have to open the link contained in the SMS to install and use PrivateGSM.