Some advanced configuration settings about the PrivateServer behavior.
2.4.1 SIP/TLS
SIP/TLS is about configuring the encrypted communication channel among PrivateServer and its clients. The configuration form is reachable by the SIP/TLS main menu entry.
From the figure 1. Cipher list configuration form you can set up the cypher list of the PrivateServer. This is the list of accepted cipher suite, using OpenSSL format. Check at http://www.openssl.org/docs/apps/ciphers.html#CIPHER_LIST_FORMAT. Usually you can leave the default values.
2.4.2 RTP
"The Real-time Transport Protocol (RTP) defines a standardized packet format for delivering audio and video over IP networks" (quote from Wikipedia).
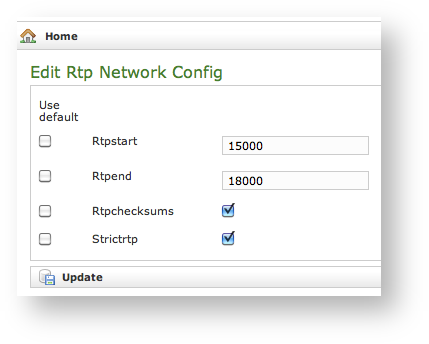
In this form that you get by the RTP main menu entry, you can set up the voice transport features. Rtpstart and Rtpend are the number of RTP ports available for the calls.
Each call uses 4 ports, thus you can do your math on the RTP number necessary in your configuration multiplying the number of foreseen concurrent calls for 4.
In the example shown in figure 2. RTP configuration form you see:
18000 - 15000 = 3000 ports available. This means 3000/4 = 750 concurrent calls threshold.
The Rtpchecksums enable the application checksum over UDP encrypted voice transmission. This is an error detection commodity, which adds 16 bits per packets payload.
Strictrtp Enables the strict RTP protection. This will drop RTP packets that do not come from the source of the RTP stream. This option is disabled by default.
2.4.3 Jitter Buffer
Jitter is the undesired deviation from true periodicity of an assumed periodic voice streaming. The consequences of jitter, often called jittering, are a voice communication with holes in it or stirring metal voice effect. Mostly on a 3/4G network (and in general in a mobile network environment), the jitter is a sensible problem to face. To avoid jitter issues a jitter buffer is implemented in PrivateServer.
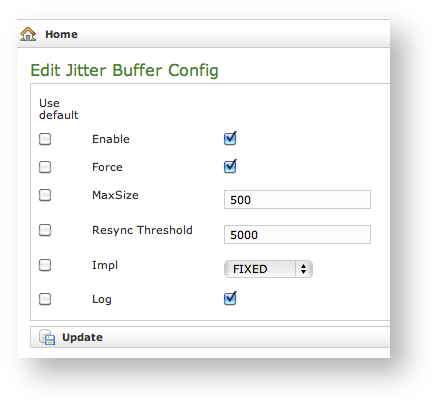
The jitter buffer is an elastic buffer in which the signal is temporarily stored and then retransmitted at a rate based on the average rate of the incoming signal. Checking the Enable checkbox you allow PrivateServer to perform such jitter buffering in general, when needed.
The Force option obliges PrivateServer to create the jitter buffer over any new communication channel.
MaxSize is the max length of the jitterbuffer in milliseconds.
Resync Threshold is the buffer synchronization threshold. It's useful to improve the quality of the voice, with big jumps in/broken timestamps. Defaults to 1000.
Impl is the Jitterbuffer implementation, used on the receiving side of a SIP channel. Two implementations are currently available:
- FIXED (with size always equals to jbmaxsize)
- ADAPTIVE (with variable size)
Defaults to FIXED.
Log enables jitterbuffer frame logging. Defaults to "no".
To apply your changes just press the Update button and the management interface will ask you to restart the asterisk service in order to apply your new configuration, as shown in
2.4.4 Obfuscation
The Obfuscation is an internal VoIP communication stealth mode. It is useful to avoid QoS (Quality of Service) checks on VoIP as it masks the data.
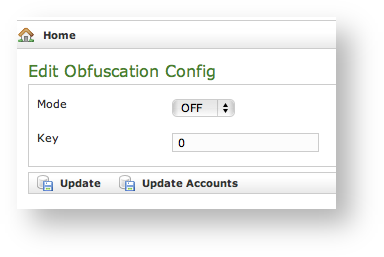
The configuration is quite simple. Mode enables/disables the obfuscation mode.
Key is a shared numeric key to be reported on the clients configuration as well.
To avoid calls problems such as abruptly interrupted calls you make sure the obfuscation mode and key are equally set up on the server and the clients.
2.4.5 NAT Configuration
If you are using the appliance in an internal network then it's most possible that you need to configure the NAT option. NAT stands for Network Address Translation and it's commonly used to let services on a private IP address to be reachable by a public IP address.
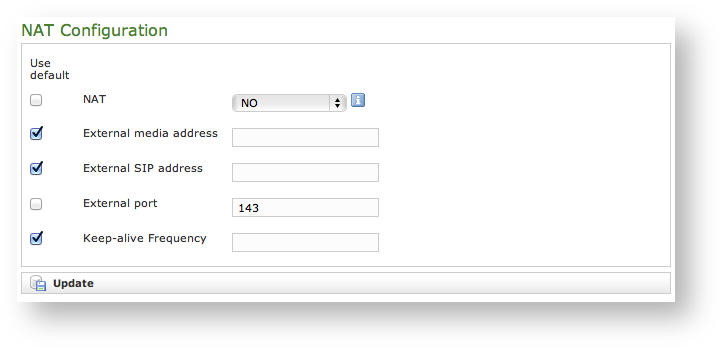
Apart from your router/firewall configuration (please check PrivateGSM installation pre-requisites) and your network design/topology, from the PrivateServer point of view the only known thing is that the appliance is configured on a private IP address but the requests of the encrypted voice service are made to an external and public IP address. To avoid wrong replies the PrivateServer must know of this setup and be configured accordingly. Thus if you fall in the described scenario access to the "NAT Configuration" form (showed in figure 6. NAT configuration form) using the "NAT" link under "Server Configuration".
By default this option is disabled, so to enable it you first need to select "YES" in "NAT" option. If you have enabled the NAT then it's mandatory to configure the remaining options as well.
NEW FEATURE
The "Keep-alive Frequency" is part of a new feature that is not directly connected to the NAT setup. To better understand what a keep-alive is, please refer to PSOM 1.0 Groups.
External media address
This is the public IP address used for the RTP delivery. It means that this is the secured voice IP you want to use.
Possible Misconfiguration
External SIP address
This is the public IP address used for the SIP delivery. It means that this is the IP you want to use for SIP signalling.
External port
If you want to perform a PAT (Port Address Translation) in addition to the NAT, then please use this option to explain to the appliance which port number is used on the external interface for providing the encrypted SIP service.
2.4.5.1 Keep-alive Frequency
If you are using the keep-alive option (please refer to PSOM 1.0 Groups) then you may find this option handy. You can define here how many seconds should pass between each keep-alive request sent by the server to each client configured with the keep-alive option.
Please keep in mind that the default keep-alive timeout is 60 seconds and thus it can lead to a quick battery drain since the radio system on the mobile device could never be idled.
If any mobile user has been configured with the keep-alive option on, then we strongly suggest you to set the keep-alive Frequency to 180 seconds (i.e. 3 minutes) at least in order to save battery life.


