1.0.1 What is this about?
In order to perform the service you need to configure some SIP accounts, meaning who is going to place and receive secure calls. In PrivateServer you can't create Accounts outside a Group. As there's no default group your first goal is to manage Groups.
1.0.2 Groups Management
A Group is just a container of users' accounts. It is useful to organize your users in a sort of address book, dividing them amongst departments or buildings for example.
There is no other use of the Groups. Each Account on your PrivateServer can call or receive calls from another one, even if they belong to different Groups.
1.0.2.1 Create
On your left you can find the main menu, which first line reads "Groups & Accounts".
You have to click on it to gain access to the group management page (figure 1. Groups & Accounts).
Your first action will be to create a new group. Thus click on the "New group" icon on the top of the page.
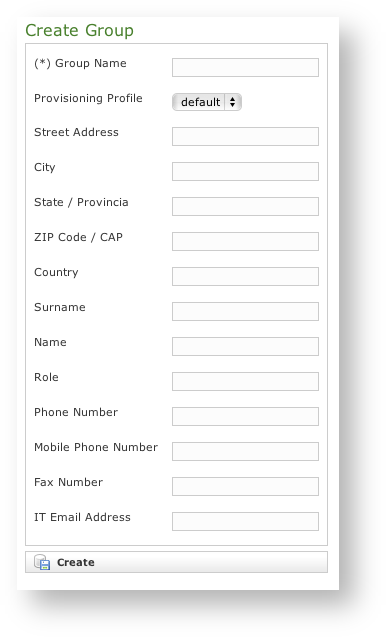
You'll be redirected on the group creation form (figure 2. Group creation Form).
The only mandatory field is "Group Name", so please pick a meaningfull name and choose whether to fill all fields. We suggest you to fill almost the IT Email Address field which we'll show up in the Groups & Accounts page after the creation procedure is completed. Please also pay attention to the Provisioning Profile you assign to the group.
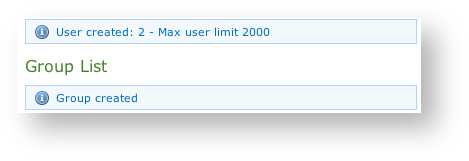
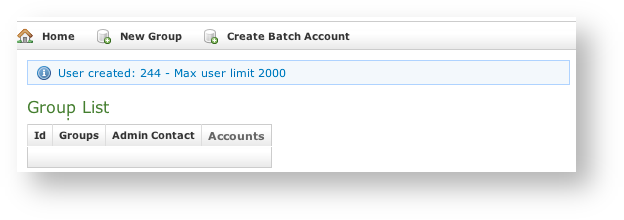
After you're done, complete the creation procedure clicking on the "Create" icon on the bottom of the page. Then you'll get back on the group management page, but this time you'll have the group just created listed as in figure 3. The group has been created successfully. The Group name value is shown and the "IT Email Address" as well. The latter is found into the Admin Contact column.
1.0.2.2 Update
To Update group's data you first have to select the group to modify. Click on the Id number down the Id column and you'll get back to the group creation form. All the field you filled can be read as when you create a new Group.

Change the necessary fields (ie IT Email Address or some other). When you are done just click on the Update button at the bottom of the page (figure 4. "Update" and "Delete" icons). You'll get back to the Groups & Accounts page where you will read the Group list once again. The new values, if they are the ones showed in the Group list table, are readable. If they are not among the ones that are shown then you just click again on the Group's Id and check the fields you changed.
1.0.2.3 Delete
It's possible to drop a Group when it's no more useful. To perform a Delete action you click on the Group's name in the Group's list.
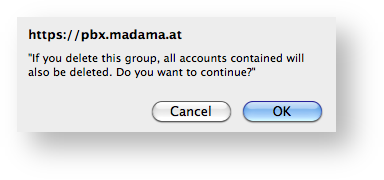
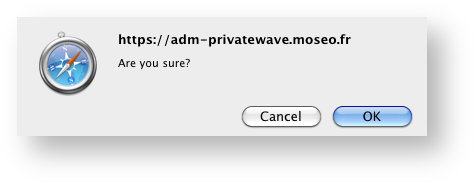
You will come again in the Edit Group form (figure 2. Group creation Form). This time push on the Delete button in the bottom area. A confirmation pop up page asks for confirmation. To continue you just push the Ok button or press Enter on your keyboard. After that you'll get back at the Groups & Accounts page.
Be careful to delete just empty groups. If you delete a Group that has Accounts belonging to it, those Accounts will be deleted as well (figure 5. Delete Group Confirmation Pop-Up Window)
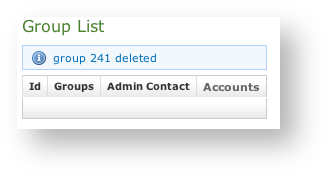
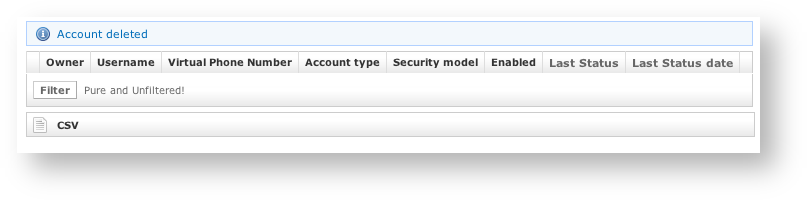
This time the Group list is empty and a warning line informs you about the deletion just occurred.
1.0.3 Accounts Management
Once you have almost one group you can fulfill it with SIP Accounts. In the Group List (figure 3. The group has been created successfully) click on the Accounts icon on the right of each group's row.
You have three way for create new users:
- the plain way: manual creation
- the wizard way: automatic activation
- tha batch way: massive creation
1.0.3.1 Create a new account, the plain way
The "plain way" is a completely manual creation of the account. In this way you control any feature of the account, but you also need to configure the user's client manually. This way is the opposite of the automatic activation.
This is the only way for creating account comely to the SNOM platform.
In the Account List page (figure 7. The Sip Users Table) you can see an empty list of accounts. To create a new Sip User you have to click on the New Account button in the top of the page.
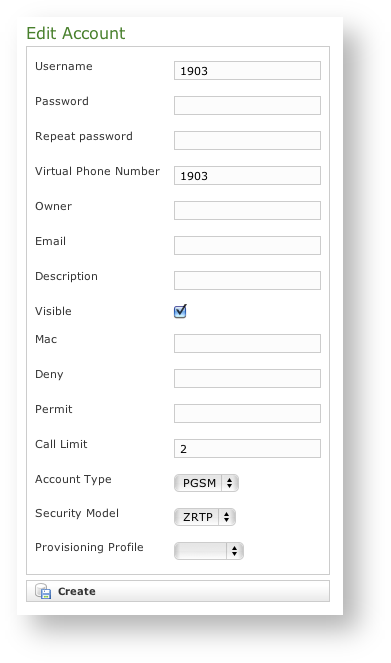
The Edit Account page will show a form with more than one field. Mandatory field are:
- Username
- Password/Repeat Password
- Virtual Phone Number
- Account Type
- Security Model
Fill the Username with a numeric value as suggested by the default value into the field. Type in a password and repeat it in the proper fields.
Username MUST be unique as Virtual Phone Number!
Set a Virtual Phone number as a numeric value of your choice. Please consider that the Virtual Phone Number is the number to be dialed to call the Account (and also the number shown as the caller, when the Account places a call). We suggest a three character number such as "111" or "123" for testing purpose. For production please insert the real phone number.
If you do not insert the international prefix before the real phone number then you cannot use the automatic activation features
Make sure the visible check button is checked as by default. This fed must be unique as well.
Account types:
- To configure a PrivateGSM account select "PGSM" by the drop down menu in "Account Type".
- To configure a SNOM account select "SNOM" by the drop down menu in "Account Type".
Security models:
- To configure a PrivateGSM Enterprise account the security model must be "SDES" in the "Security Model".
- To configure a PrivateGSM Professional account the security model must be "ZRTP".
- To configure a Snom account the security model must be "SDES".
After you completed the fill in, click on the Create icon at the page's bottom.
You'll get back the Account List page and the table shows now your new user (figure 9. new SIP account).
Using this way makes the account enabled by default.
To use the automatic activation even in the plain way go reading the paragraph 1.0.3.6.
1.0.3.2 Create a new account, the wizard way
The "wizard way" is the new method for creating accounts. It's made for easing the load on the service manager's shoulder, letting him/her focusing on the service configuration without having to bother about the installation and configuration of the client.
In the Account List page (figure 7. The Sip Users Table) you can see an empty list of accounts. To create a new Sip User you have to click on the New Account (Activation Wizard) button in the top of the page.

You'll see the "Edit Account page" with a precompiled, non-editable username as in figure 10. new account by wizard.
Please set a Virtual Phone Number and choose a Provisioning Profile.
If you do not insert the international prefix before the real phone number then you cannot use the automatic activation features
If not differently configured, the default values for the Obfuscation are fine. The other fields are optional.
In this mode the password is automatically chosen by the system and it's not editable
Compile all necessary fields of the new account, select a Provisioning Profile and click on "Create". Now jump to paragraph 1.0.3.6 for activate the user.
In the "wizard way" the user's account are DISABLED until the automatic activation is performed!
1.0.3.2 Create a new account, the batch way
The "batch way" is an account creation mode designed specifically for large number of users to be created quickly.
Starting from Account List page figure 7. The Sip Users Tableclick on the Create batch account action to open Create batch account page:
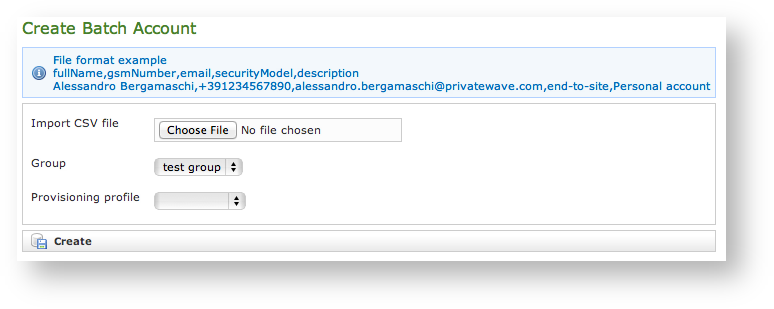
Prepare a .csv file with some account. The file must be formatted as the example below.
fullName,gsmNumber,email,securityModel,description
Alessandro Bergamaschi,+391234567890,alessandro.bergamaschi@privatewave.com,end-to-site,Personal account
Luigi Rossi,+3932456753,luigi.rossi@privatewave.com,end-to-site,Personal account
Marco Bianchi,+39432242342,mbianchi@gmail.com,end-to-site,Personal account
Mario Colombo,+394325346546,colombo.mario@privatewave.com,end-to-site,Personal account
Select the default provisioning profile and a group for the newly account created. Upload the file and click create: you'll be leaded to the Group list page
1.0.3.4 Update
To change the SIP Account values you must first select it from the Accounts List: just click on the Username and the Edit Account form is shown (figure 8. Sip Account creation form).
Change the values you need to and then click on the Update button at the bottom of the form to save the changes. The new values are shown into the Accounts' table back in the "Account List" page.
A line will warn you about the update.
1.0.3.5 Delete
Select the Account from the Account List and get the Edit Account page. Click on the Delete button at the bottom of the page to delete the SIP Account. A warning pop up window will be shown.
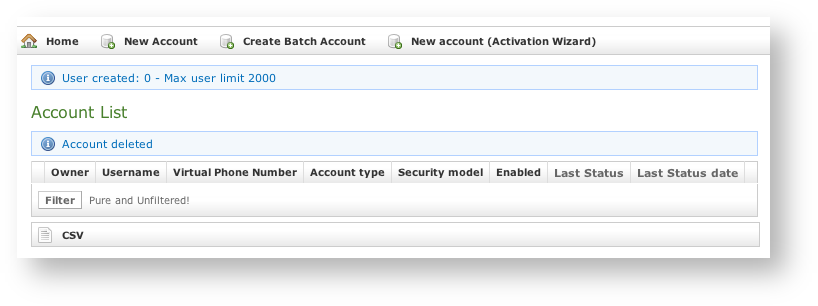
Just select the "Ok" button or press Enter to confirm. The Account List page will show up without the Account.
1.0.3.6 Automatic Activation
After you created your new account(s) you have to configure the customer's client application PrivateGSM. In the wizard way it's MANDATORY to use the automatic activation in order to enable the account. In the plain way it's optional, though useful.
When you have just finished creating the new account (as in figure 9. new SIP account) or picking up the account from the account list ( see figure 12. The Account has been updated) you can send to the customer both a download SMS and a configuration SMS so that he/she would proceed with the installation of the client without any other human help. Click on the "Send installation SMS" to send the link for downloading the application.
Confirm as in the above picture and the PrivateServer advices the operation has been completed:

The SMSes are sent to the account's Virtual Phone Number, so please check it exist as an actual mobile phone number before using the Automatic Activation
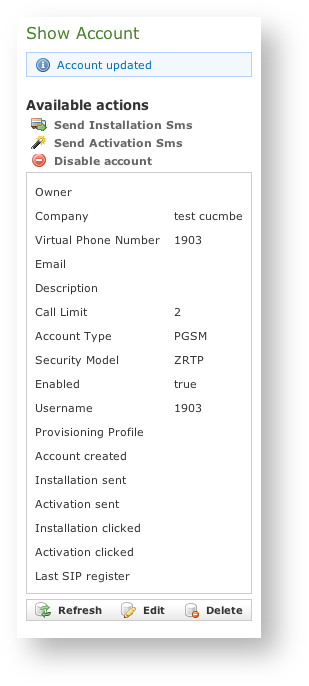
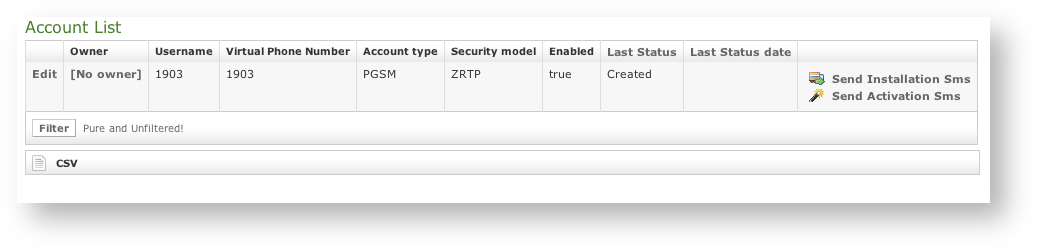
Getting back to the account list you can read the exact status and the time of its change:
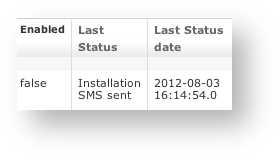
So what's happened is that the status has changed from "Created" to "Installation SMS sent" and the "Last Status date" has been updated to the time the SMS has been sent to the customer.
The Automatic Activation and the Provisioning Profiles must be set up to have this procedure to work.
After the customer has downloaded and installed the application, the "Last status" changes to "Installed" but the "Enabled" is still "False". "Last Status date" is updated as well.
Next step is to send the "Activation SMS" in order to enable the user to place and receive calls.
Just click on the related link at the end of the customer's row in the Account list table. As for the "Installation SMS" you are requested to confirm the action (refer to figure 14. confirm sms).
Note the change in the "Last Status" and in the "Last Status date": the former is now "Activation SMS sent", the latter is updated to the new time the action was performed.
You can know for sure that the user has configured his/her PrivateGSM application because after the action has been performed the account's "Last Status" becomes "Activated" and the "Last Status date" is updated as in the former cases.
Now the "Enabled" fields is changed to "true" meaning that the customer is ready to go.
Please remember that if you created the account in plain way then the account is enabled by default, no matter if you sent the Activation SMS or not.
If the customer actually goes on line with the PrivateGSM application, than the "Last Status" becomes "Connected".
You can check if the customer is connected using the "Registered Account" menu.