1.1.1 Accounts Management
Once you have almost one group you can fulfill it with SIP Accounts. In the Group List (PSOM 1.0 Groups) click on the Accounts icon on the right of each group's row.
| Subtitle | ||||||
|---|---|---|---|---|---|---|
| ||||||
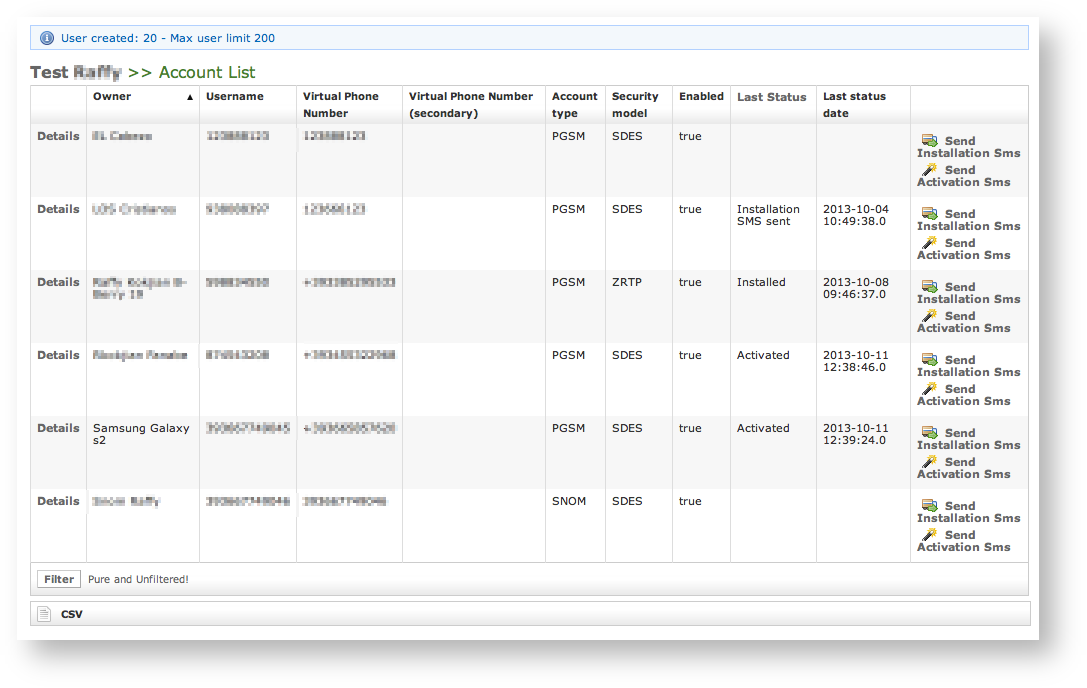 |
As a general list of the accounts which are present in each group, the one shown in
illustrates the main features for each account.Xref AnchorName sip users table
The first column is reserved for the Details, which is a link to monitor each account's activities, current status and configuration. Most of the following fields are quite self-explanatory. The last column is for quick links about installation and configuration of customer's clients.
Send Installation Sms is good for sending via Text message a link meant to be used to download and thus install the PrivateGSM application. More about the Automatic Activation and about the Provisioning can be read in paragraph 1.1.4.
| Info |
|---|
The customer's platform is automatically detected. |
Send Activation Sms serves to plant the configuration file into the selected customer's client using Text Message as a mean of transport. The Text Message would include an URL to be used for downloading the configuration file itself.
You have three way for create new users:
- the plain way: manual configuration
- the wizard way: automatic activation
- the batch way
Each one is going to be detailed in the next paragraphs.
1.1.1.1 Create a new account, the plain way (manual configuration)
The "plain way" is a completely manual creation of the account. In this way you control any feature of the account, but you also need to configure the user's client manually. This way is the opposite of the automatic activation.
| Warning |
|---|
This is the way for creating valid accounts for the SNOM devices. |
In the Account List page (
) you can see an empty list of accounts. To create a new Sip User you have to click on the New Account button in the top of the page.Xref AnchorName sip users table
You can create both PGSM (PrivateGSM) or SNOM accounts and they do differ a while.
1.1.1.1.1 PGSM
| Subtitle | ||||||
|---|---|---|---|---|---|---|
| ||||||
|
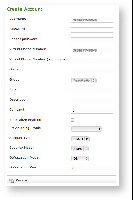
The Create Account page will show a form with many fields. Mandatory ones are:
Username
Password/Repeat Password
Virtual Phone Number
Account Type
Security Model
Obfuscation Mode
Obfuscation Key
Keep-alive Enabled
Username/Password
Username field is automatically generated as a random numeric value and you are not required to change it. Type in a password and repeat it in the proper fields.
| Warning |
|---|
If you manually edit Username field, keep in mind that it MUST be unique, as Virtual Phone Number! |
Virtual Phone Number
Set a Virtual Phone number as a numeric value of your choice. Please consider that the Virtual Phone Number is the number to be dialed to call the Account (and also the number shown as the caller, when the Account dials a call). We suggest a three character number such as "111" or "123" for SNOM devices and actual mobile phone number for PrivateGSM accounts.
| Warning |
|---|
Mobile phone numbers must be formatted with international prefix and + sign, before the real phone number, eg: +391234567890. If you do not use international format, it will not be possible to use automatic activation features. |
Automatic Activation is not meant for SNOM devices or iPad. You need a PrivateGSM client in order to process the URL and the configuration itself. Plus without a phone that can receive an SMS, it wouldn't be delivered at all.
| Note |
|---|
It's still possible to perform an Automatic Activation or to send the installation URL on iPads or devices without phone features using the Provisioning Messages. |
Account Type
To configure a PrivateGSM account select "PGSM" by the drop down menu in "Account Type".
To configure a SNOM account select "SNOM" by the drop down menu in "Account Type".
Security Models
To configure a PrivateGSM Enterprise account the security model must be "SDES".
To configure a PrivateGSM Professional account the security model must be "ZRTP".
To configure a Snom account the security model must be "SDES".
Obfuscation Mode
The Obfuscation mode is a simple but quite efficient trick to let the VoIP pass without being recognized by network equipment intended to block or censor VoIP traffic.
It's not known to be a perfect mask and it aims not to be one, still it works fine up to now and our suggestion is to keep it enabled as by default,
Obfuscation Key
The key used by the obfuscator can be an arbitrary one, still "9" is the default value. It doesn't matter which number you put in here as long as it is the very same one you set up on the client side.
| Warning |
|---|
If the Obfuscation Key value is not the same on both client's account and server's one, then the call won't be placed properly and it might end suddenly voiceless. |
| Xrefanchor | ||
|---|---|---|
| ||
Keep-alive Enabled |
In order to receive secure phone calls, PrivateGSM client must set up an always-on connection to PrivateServer. Each client sends a "keep alive" request to the server it is connected to, in order to keep up the socket. This is necessary as the TCP socket has an idle timeout after which the socket is closed. Some aggressive network equipment can shorten the standard timeout, less than 10 minutes. This behavior is particularly critical with IOS devices.
In order to avoid the socket break caused by such aggressive network equipment, you can enable a server side "keep alive" request. In this way you can be sure that the socket and thus the connection would remain up and stable under every circumstances.
| Note |
|---|
The downside of this option is that there will be some more traffic on the socket (each passage of the request is 1.8 KiloByte, thus you can count almost 3.6 KB of traffic) |
| Warning | ||
|---|---|---|
| ||
This option can afflict the battery life since more traffic means more radio transmission and on same devices the radio wouldn't have a proper timeout for going idle. |
The actual default value for the keep-alive interval is 60 seconds. You can configure the general keep-alive timeout in the NAT configuration form. Please read PSAM 2.4 Asterisk advanced configurations to get informations about it.
| Warning | ||
|---|---|---|
| ||
All the PrivateGSM clients prior to the 11.1 version cannot respond to the keep-alive request and thus if such option was enabled for their users, then those users won't ever be on-line and reachable. |
Virtual Phone Number (secondary)
This field is optional and rarely used, still it can prove itself quite useful if you need the account to be reachable by two different phone numbers on the same device. The secondary virtual number can't substitute the primary one, meaning that this field alone won't be accepted as a valid phone number. You still need to configure the primary phone number if you intend to make use of the secondary one.
| Info |
|---|
Some example for using the secondary phone number are this scenarios:
|
1.1.1.1.2 SNOM
In the Account List page (
) you can see an empty list of accounts. To create a new Sip User you have to click on the New Account button in the top of the page.Xref AnchorName sip users table
| Subtitle | ||||||
|---|---|---|---|---|---|---|
| ||||||
There are some few but still important differences between the
and the Xref AnchorName account creation form SNOM
: security model, obfuscation Mode and Obfuscation Key fields are gone and instead you can read Deny and Permit. Due to the type of hardware underlying the SNOM account, we do assume that the hardware would be wired connected on a desktop. Also no obfuscation is possible because the device doesn't allow it. Instead the wired channel can provide us an easy to go access list, based on the LAN IP addresses. We can create both one White-List and one Black-List in order to bind the user's access to one specific device which can be identified by the LAN IP address. The different option shown are:Xref AnchorName account creation form
- Deny
- Permit
Deny
Deny represent the blacklist based on the IP address and the net mask we want to deny when associated to the current user. You have to write this in the form: <ipaddress>/<network mask>
Examples:
- 192.168.0.38/255.255.255.255 : Denies traffic from this IP address
- 0.0.0.0/0.0.0.0 : Denies every address
Permit
Permit is the exact opposite of the Deny option. It represent the whitelist based on the IP address and the net mask we want to have access. You have to write this in the form: <ipaddress>/<network mask>
Example:
- 192.168.0.38/255.255.255.0 : Allows traffic from this Network
| Tip | ||
|---|---|---|
| ||
You may have multiple rules for masking traffic. Combining together the Deny and the Permit option let you have a fine grain rule of access for any single user's account. Please keep in mind that the access rules are processed from the first to the last, meaning that the Deny will be used first and then will be analysed the Permit one. So: Deny: 0.0.0.0/0.0.0.0 Permit: 216.27.242.66/255.255.255.255 Deny every address except for the only one allowed. |
1.1.1.1.3 Actually create the Account
After you filled in the form (either the PGSM or the SNOM one), please click on the Create icon at the page's bottom.
| Subtitle | ||||||
|---|---|---|---|---|---|---|
| ||||||
|
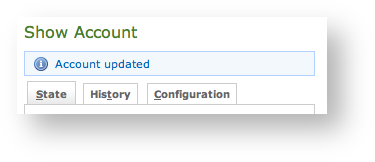
| Tip |
|---|
An information line advice the operation just performed. |
You'll get back the Account List page and the table shows now your new user (
).Xref AnchorName new sip account
| Note |
|---|
Using this way makes the account enabled by default. |
To use the automatic activation even in the plain way go reading the 1.1.4 Automatic Activation.
1.1.1.2 Create a new account, the wizard way (automatic activation)
The "wizard way" is the new method for creating accounts. It's made for easing the load on the service manager's shoulder, letting him/her focusing on the service configuration without having to bother about the installation and configuration of the client.
In the Account List page (
) you can see an empty list of accounts. To create a new Sip User you have to click on the New Account (Activation Wizard) button in the top of the page.Xref AnchorName sip users table
| Subtitle | ||||||
|---|---|---|---|---|---|---|
| ||||||
You'll see the "Edit Account page" with a precompiled, non-editable username as in
.Xref AnchorName new account by wizard
Please set a Virtual Phone Number and choose a Provisioning Profile.
| Warning |
|---|
If you do not insert the international prefix before the real phone number then you cannot use the automatic activation features |
If not differently configured, the default values for the Obfuscation are fine. The other fields are optional.
| Note |
|---|
In this mode the password is automatically chosen by the system and it's not editable |
Compile all necessary fields of the new account, select a Provisioning Profile and click on "Create". Now jump to paragraph 1.0.3.6 for activate the user.
| Warning |
|---|
In the "wizard way" the user's account are DISABLED until the automatic activation is performed! |
1.1.1.3 Create a new account, the batch way
The "batch way" is an account creation mode designed specifically for large number of users to be created quickly.
Starting from Account List page
click on the Create batch account action to open Create batch account page:Xref AnchorName sip users table
| Subtitle | ||||||
|---|---|---|---|---|---|---|
| ||||||
Prepare a .csv file with some account. The file must be formatted as the example below, keeping header names in the first row
| Code Block | ||||
|---|---|---|---|---|
| ||||
fullName,gsmNumber,email,securityModel,description Alessandro Bergamaschi,+391234567890,alessandro.bergamaschi@privatewave.com,end-to-site,Personal account Luigi Rossi,+3932456753,luigi.rossi@privatewave.com,end-to-site,Personal account Marco Bianchi,+39432242342,mbianchi@gmail.com,end-to-site,Personal account Mario Colombo,+394325346546,colombo.mario@privatewave.com,end-to-site,Personal account |
Select the default provisioning profile and a group for the newly account created. Upload the file and click create: you'll be leaded to the Group list page.
Once you've done you can choose whether to manually activate the user or to lean on the automatic activation.
| Anchor | ||||
|---|---|---|---|---|
|
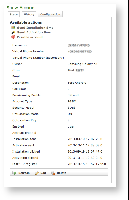
The figure
shows the last step of the procedure for account creation, but it's the same view you can get clicking on the Details link in the first column of the account's list (as in Xref AnchorName new sip account
. Xref AnchorName sip users table
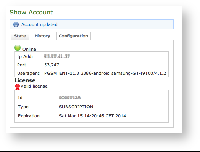
Three tabs are shown in the Account's details window:
- State
- History
- Configuration
State is the default view you get and shows if the Account is connected and his licence status.
| Subtitle | ||||||
|---|---|---|---|---|---|---|
| ||||||
|

History shows any relevant information about the account.
| Subtitle | ||||||
|---|---|---|---|---|---|---|
| ||||||
|
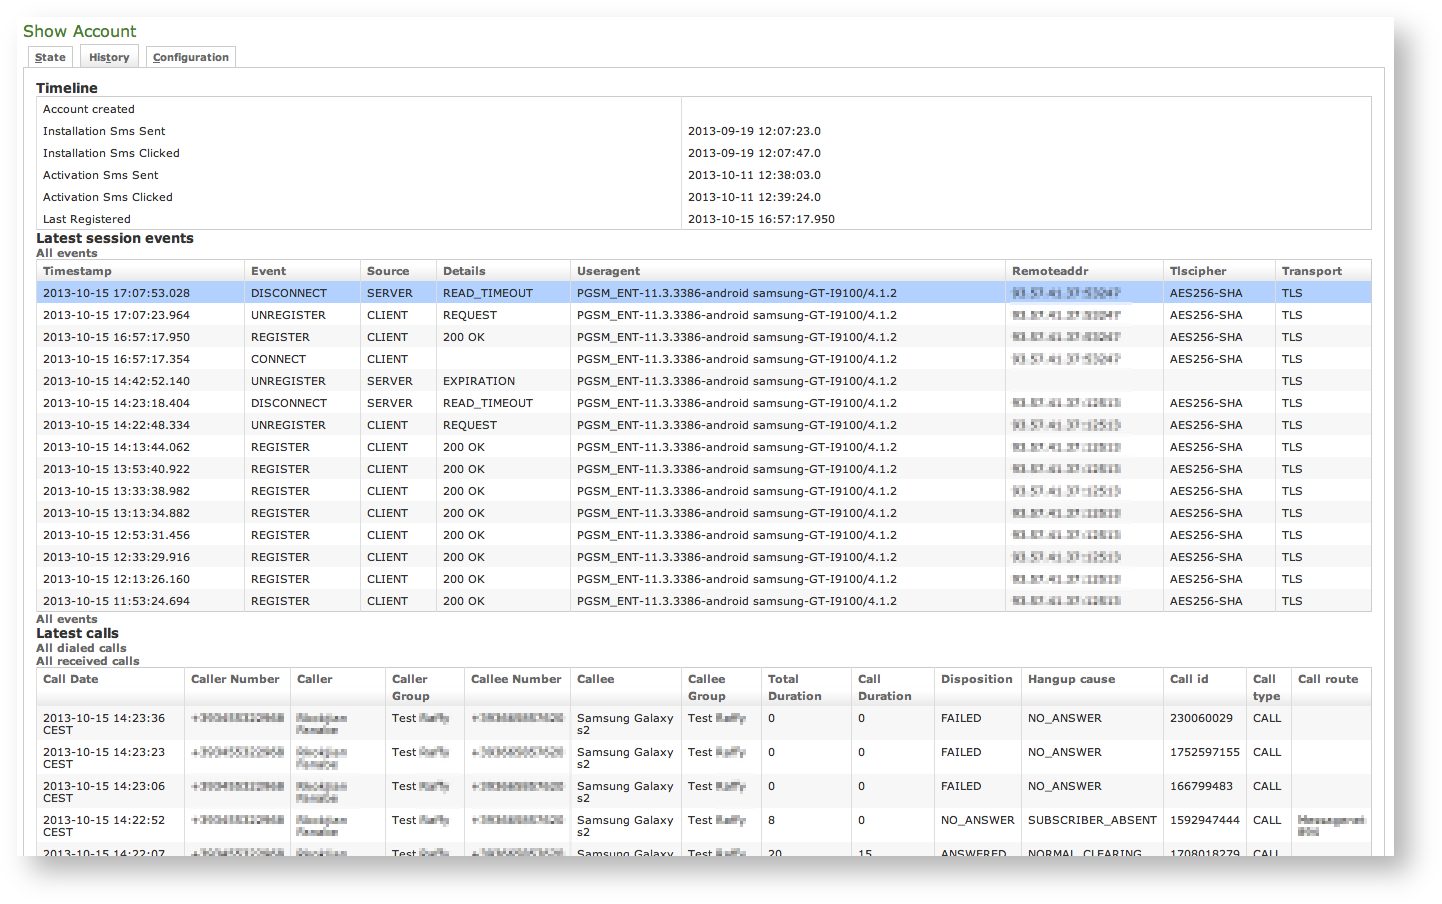
As you can see in
| Xref | ||
|---|---|---|
|
- Timeline lists all the informations about the creation and activation of the account as well as date and time of text messages sent and received.
- Last session events is an excerpt of the SIP Sessions targeted to the account.
- Latest calls is an excerpt of the CDR showing all the recent calls placed by the account. It's possible to show all the received calls as well, by clicking on the All received calls at the list's bottom.
| Info |
|---|
Each list is expandable to show any record related to the account. This is possible by using the proper links at the bottom of each form displayed. |
Configuration is what's left of the account's details form as it was intended in previous versions of PrivateServer.
| Subtitle | ||||||
|---|---|---|---|---|---|---|
| ||||||
|
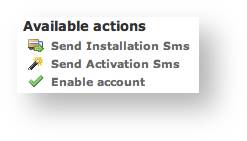
From this summary of the account's configurations you can manage the account itself. It's possible to Send Installation Sms or to Send Activation Sms, action which we explore deeper in paragraph 1.1.4, as well as to Disable account. The last action inhibits the user to call or to be called and a specific Audio Message is issued by the PrivateServer to inform the user.
It's also possible to Edit the account's settings (more about this in the paragraph 1.1.2), Refresh account's data (which is proved to be quite useful to monitor the Text Messages status, like the Installation clicked) or simply Delete (paragraph 1.1.3) the account itself. In the following paragraphs you'll read more about account's management.
Anchor account_update account_update
1.1.2 Update the Account
| account_update | |
| account_update |
To change the SIP Account values you need to reach the form showed in
, which has been explained in the paragraph 1.1.1.4. Once there, you can just press the Edit button at the bottom.Xref AnchorName show_account_configuration
| Subtitle | ||||||
|---|---|---|---|---|---|---|
| ||||||
|
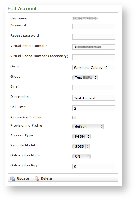
In the form that would be presented to you (shown in
) it's possible to change any value you need to. Once you're done, click on the Update button at the bottom of the form to save the changes. Xref AnchorName edit_account_form
| Subtitle | ||||||
|---|---|---|---|---|---|---|
| ||||||
|
As shown in
| Xref | ||
|---|---|---|
|
| Anchor | ||||
|---|---|---|---|---|
|
In order to delete the account you have to access at the account details as described in paragraph 1.1.1.4. You have to get the Configuration details as in
. At the bottom of the details window you can see a Delete button that's what you're looking for. Xref AnchorName show_account_configuration
| Subtitle | ||||||
|---|---|---|---|---|---|---|
| ||||||
|
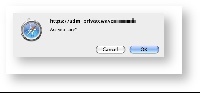
Press it and confirm the deletion in the next warning pop up window (
). Xref AnchorName confirm_sms
| Subtitle | ||||||
|---|---|---|---|---|---|---|
| ||||||
|
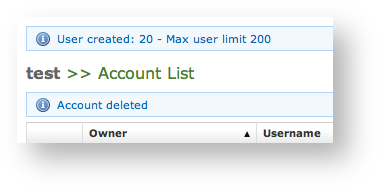
Once you're done, by pressing the "Ok" button, the Account List page will be shown up without the Account and with a warning: see Xref AnchorName account deleted
| Anchor | ||||
|---|---|---|---|---|
|
After you created your new account(s) you have to configure the customer's client application PrivateGSM. In the wizard way it's MANDATORY to use the automatic activation in order to enable the account. In the plain way it's optional, though useful.
The Automatic Activation is quite useful in two occasions:
- after you just finished creating an user
- whenever you need a quick account's reconfiguration without involving too much the user
To be able to send text messages with the Automatic Activation you first need to get the Account list (
| Xref | ||
|---|---|---|
|
| Xref | ||
|---|---|---|
|
| Info |
|---|
Click on the "Send installation SMS" to send the link for downloading the application |
Confirm as in the above picture and the PrivateServer advices the operation has been completed:
| Subtitle | ||||||
|---|---|---|---|---|---|---|
| ||||||
| Warning |
|---|
The SMSs are sent to the account's Virtual Phone Number, so please check it exist as an actual mobile phone number before using the Automatic Activation |
Getting back to the account list you can read the exact status and the time of its change:
| Subtitle | ||||||
|---|---|---|---|---|---|---|
| ||||||
So what's happened is that the status has changed from "Created" to "Installation SMS sent" and the "Last Status date" has been updated to the time the SMS has been sent to the customer.
| Note |
|---|
The Automatic Activation and the Provisioning Profiles must be set up to have this procedure to work. |
After the customer has downloaded and installed the application, the "Last status" changes to "Installed" but the "Enabled" is still "False". "Last Status date" is updated as well.
Next step is to send the "Activation SMS" in order to enable the user to place and receive calls.
Just click on the related link at the end of the customer's row in the Account list table. As for the "Installation SMS" you are requested to confirm the action (refer to
).Xref AnchorName confirm sms
Note the change in the "Last Status" and in the "Last Status date": the former is now "Activation SMS sent", the latter is updated to the new time the action was performed.
You can know for sure that the user has configured his/her PrivateGSM application because after the action has been performed the account's "Last Status" becomes "Activated" and the "Last Status date" is updated as in the former cases.
Now the "Enabled" fields is changed to "true" meaning that the customer is ready to go.
| Note |
|---|
Please remember that if you created the account in plain way then the account is enabled by default, no matter if you sent the Activation SMS or not. |
If the customer actually goes on line with the PrivateGSM application, than the "Last Status" becomes "Connected".
| Tip |
|---|
You can check if the customer is connected using the "Registered Account" menu. |
| Anchor | ||||
|---|---|---|---|---|
|
If you need to temporary block any account in both directions so that he cannot place or receive calls, then you can just disable him. When a disabled account tries to perform secure voice actions a proper audio message is played warning about the account' status.
Any account is enabled by default.
In order to disable an account you need first to reach the form shown in
| Xref | ||
|---|---|---|
|
| Subtitle | ||||||
|---|---|---|---|---|---|---|
| ||||||
|
Just press it and it will change as in
| Xref | ||
|---|---|---|
|
1.1.6 Searching an Account
You can search search a group's accounts with the search box on the menu bar of the Account list page.
| Subtitle | ||||||
|---|---|---|---|---|---|---|
| ||||||
The search covers the following fields of accounts:
- Owner
- Username
- Caller id
- Description
The search string is interpreted as a list of words, separated by spaces. All words in the search string must match. Words must match exactly, unless they contain wildcards:
- *: matches zero or more characters
- ?: matches one character, any character
Examples:
- Marco matches "Marco Rossi" and "Marco Bianchi", but not "Giulio Marconi"
- Marco Rossi matches "Marco Rossi", but neither "Marco Bianchi" nor "Giulio Marconi"
- Marco* matches "Marco Rossi", "Marco Bianchi" and "Giulio Marconi"
- Marco?? matches "Giulio Marconi", but neither "Marco Rossi" nor "Marco Bianchi"
| Info |
|---|
The search engine is based on Apache Lucene; see "Query Parser Syntax" for a detailed description of the full syntax of search queries. The field names that can be used in search queries are |
| Anchor | ||||
|---|---|---|---|---|
|
The communication model of the licence can change quite a bit based on how user activated his account. Manual account creation leads the licence client on PrivateGSM to communicate directly with PrivateWave's licence server. Automatic Activated clients would communicated with their own PrivateServer, which plays the role of a proxy to PrivateWave's licence server. In the latter case, the current licence is cached on PrivateServer and visible in account details.
| Info | ||
|---|---|---|
| ||
Let's say we have a PrivateServer named test1.privatewave.com. This PrivateServer sent an Automatic Activation text message to the client PGSM_A. PGSM_A would ask to test1.privatewave.com for its licence validation. If it was a manual configured account, then it would ask its licence validation to the main licence server. |
Since the licence validation is an important component of the secure call, it's important that this difference in the behaviour of the client is fully understood by the Operator Manager. For instance if the Services weren't configured to let the HTTPS/SmartPhone Web Service be reachable on the public NIC, then the licence clients of any Automatically Activated PrivateGSMs would never be able to validate their own licences and thus the client would be stuck until its licence status would be cleared somehow.
Navbar