...
| Subtitle | ||||||
|---|---|---|---|---|---|---|
| ||||||
 |
1.1.1.1 Create a new account, the plain way
...
There are some few but still important differences between the
and the Xref AnchorName account creation form SNOM
: security model, obfuscation Mode and Obfuscation Key fields are gone and instead you can read Mac, Deny and Permit. Due to the type of hardware underlying the SNOM account, we do assume that the hardware would be wired connected on a desktop. Also no obfuscation is possible because the device doesn't allow it. Instead the wired channel can provide us an easy to go access list, based on the LAN IP addresses. We can create both one White-List and one Black-List in order to bind the user's access to one specific device which can be identified by the LAN IP address. The different option shown are:Xref AnchorName account creation form
...
- Deny
- Permit
Mac
The Mac is for putting in the MAC Address of the SNOM in order to bind the user to a specific hardware.
| Warning |
|---|
| This option is a legacy from the older designs. Actually it's not used and is present only for retro compatibility. |
| Info | ||
|---|---|---|
| ||
| In the next version we foresee this option is going to be removed. |
Deny
...
Deny
Deny represent the blacklist based on the IP address and the net mask we want to deny when associated to the current user. You have to write this in the form: <ipaddress>/<network mask>
Examples:
- 192.168.0.38/255.255.255.255 : Denies traffic from this IP address
- 0.0.0.0/0.0.0.0 : Denies every address
Permit
Permit is the exact opposite of the Deny option. It represent the whitelist based on the IP address and the net mask we want to deny when associated to the current user. You have access. You have to write this in the form: <ipaddress>/<network mask>
...
Example:
- 192.168.0.38/255.255.255.255 0 : Denies Allows traffic from this IP address
- 0.0.0.0/0.0.0.0 : Denies every address
Permit
Permit is the exact opposite of the Deny option. It represent the whitelist based on the IP address and the net mask we want to have access. You have to write this in the form: <ipaddress>/<network mask>
Example:
- 192.168.0.38Network
| Tip | ||
|---|---|---|
| ||
You may have multiple rules for masking traffic. Combining together the Deny and the Permit option let you have a fine grain rule of access for any single user's account. Please keep in mind that the access rules are processed from the first to the last, meaning that the Deny will be used first and then will be analysed the Permit one. So: Deny: 0.0.0.0/0.0.0.0 Permit: 216.27.242.66/255.255.255. |
...
| Tip | ||
|---|---|---|
| ||
You may have multiple rules for masking traffic. Combining together the Deny and the Permit option let you have a fine grain rule of access for any single user's account. Please keep in mind that the access rules are processed from the first to the last, meaning that the Deny will be used first and then will be analysed the Permit one. So: Deny: 0.0.0.0/0.0.0.0 Permit: 216.27.242.66/255.255.255.255 Deny every address except for the only one allowed. |
1.1.1.1.3 Actually create the Account
After you filled in the form (either the PGSM or the SNOM one), please click on the Create icon at the page's bottom.
| Subtitle | |
|---|---|
| Prefix | figure | SubtitleText | new SIP account255 Deny every address except for the only one allowed. |
1.1.1.1.3 Actually create the Account
After you filled in the form (either the PGSM or the SNOM one), please click on the Create icon at the page's bottom.
| Subtitle | ||||||
|---|---|---|---|---|---|---|
| ||||||
| Tip |
|---|
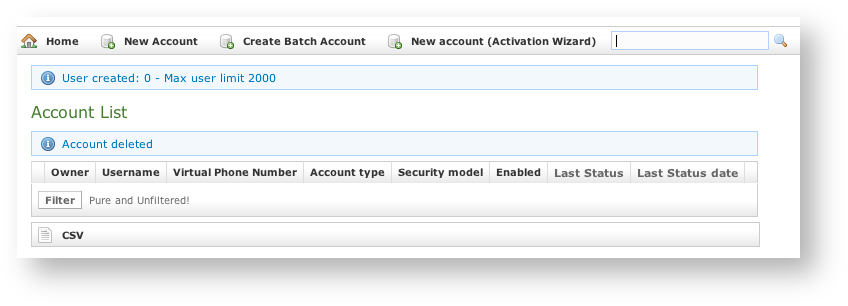
An information line advice the operation just performed. |
You'll get back the Account List page and the table shows now your new user (Xref AnchorName new sip account
...
| Tip |
|---|
An information line advice the operation just performed. |
You'll get back the Account List page and the table shows now your new user (
).Xref AnchorName new sip account
).
| Note |
|---|
Using this way makes the account enabled by default. |
...
If the customer actually goes on line with the PrivateGSM application, than the "Last Status" becomes "Connected".
| Tip |
|---|
You can check if the customer is connected using the "Registered Account" menu. |
" becomes "Connected".
| Tip |
|---|
You can check if the customer is connected using the "Registered Account" menu. |
1.1.5 Searching accounts
You can search search a group's accounts with the search box on the menu bar of the Account list page.
| Subtitle | ||||||
|---|---|---|---|---|---|---|
| ||||||
 |
The search covers the following fields of accounts:
- Owner
- Username
- Caller id
- Description
The search string is interpreted as a list of words, separated by spaces. All words in the search string must match. Words must match exactly, unless they contain wildcards:
- *: matches zero or more characters
- ?: matches one character, any character
Examples:
- Marco matches "Marco Rossi" and "Marco Bianchi", but not "Giulio Marconi"
- Marco Rossi matches "Marco Rossi", but neither "Marco Bianchi" nor "Giulio Marconi"
- Marco* matches "Marco Rossi", "Marco Bianchi" and "Giulio Marconi"
- Marco?? matches "Giulio Marconi", but neither "Marco Rossi" nor "Marco Bianchi"
| Info |
|---|
The search engine is based on Apache Lucene; see "Query Parser Syntax" for a detailed description of the full syntax of search queries. The field names that can be used in search queries are |
Navbar