Provisioning profileProvisioning profile is a PrivateGSM configuration template, that can be re-used across different VoIP accounts. It is possible to create different provisioning profile, depending on organization and groups of users. Provisioning profile can be assigned to a group, as a default profile for all VoIP account in that group. It is possible to assign a provisioning profile to a specific VoIP account, overriding the group configuration. CSR can select and assign a specific provisioning profile. | Subtitle |
|---|
| Prefix | figure |
|---|
| SubtitleText | default provisioning profile |
|---|
| AnchorName | default provisioning profile |
|---|
| 
|
By default the appliance comes with a default provisioning profile (shown in | Xref |
|---|
| AnchorName | default provisioning profile |
|---|
|
).Create a new provisioning profileIn order to create a new provisioning profile you have to press the "New ProvisioningProfile" button and get a new profile form as below: | Subtitle |
|---|
| Prefix | figure |
|---|
| SubtitleText | new provisioning profile |
|---|
| AnchorName | new provisioning profile |
|---|
| 
|
| Tip |
|---|
| The provisioning profile can contain an OEM license code that can be used during the initial license activation. |
| Tip |
|---|
| The only mandatory field is the provisioning profile name. |
Options useful for customer supportMost of the field can be left as by default. You probably need to fill: - Customer Service Phone: number to be called to reach the customer service
- Customer Service Email: email that will receive the logs and the complaints about the issues
- Logging: it's not mandatory but still very suggested to enable the logging in the clients for possible troubleshooting analysis
- Read only settings: very handy to keep the application control. This wouldn't let the user to change the settings by his/hers own.
BlackBerry specific optionsBlackberry devices require some specific configuration to work, especially the transport type to be used for the always-on connection used by signaling traffic (SIP over TLS): - BES: this transport routes your traffic through RIM servers around the world.
- BIS-B: this transport routes your traffic through RIM servers around the world.
- Direct-TCP: this is usual internet access option used on all other smartphone platforms, using internet APN.
| Info |
|---|
We strongly suggest to use Direct-TCP transport, both for privacy and performances reasons: - Privacy: signaling traffic is encrypted, that means that nobody can know who you called, but it is still possible to detect when you had a secure call. If you select Direct-TCP, your mobile operator or an attacker sniffing your traffic could know it. If you select BES or BIS-B also RIM can know this information
- Performances: RIM network (BES and BIS-B) is an overlay network, which add both latency and quality issues over your mobile operator network. It is still memorable the RIM server failure happened on October 2011, with one week outage
|
| Warning |
|---|
APN configuration is mandatory, whichever transport you choose: - BES and BIS-B transport cannot route UDP traffic used during secure call
- Direct-TCP: APN configured here will be used only by PrivateGSM client, not by other installed applications
|
Secure Messaging option- Enable Messaging: enables Secure Messaging feature on PrivateGSM.
| Warning |
|---|
By default this option is NOT set |
, so if | Tip |
|---|
If you want your customers to |
let your user use this feature then you are obliged to check |
it the above option and then you have to provision the new configuration to all the interested clients. |
Privacy options- User can edit history log size: if checked, then customers can change theirs History log size. History is a new way of grouping events occurred on the client, both Secure Calls and Secure Messages. Thus it's an important privacy subject how many events can stay in the History list.
- History log size: In case users were not able to set their history size it could be convenient to decide a maximum amount of events to be shown client side. This option is where you can take this decision. Please consider that default value is 50 events per user.
| Info |
|---|
As History groups events by the contact's numbers they occurred to, then History size number is to be meant as per contact's number. Eg: if there's a 50 events value set in History log size, each contact listed in History can show up to 50 events. 10 contacts who had events with a customer then create 500 (50 max events list * 10 contacts) history log lines, all grouped by contact's number. |
Once you completed to fill the form you can proceed with the profile creation just pressing the "Create" button at the bottom. | Subtitle |
|---|
| Prefix | figure |
|---|
| SubtitleText | new provisioning profile created |
|---|
| AnchorName | new provisioning profile created |
|---|
| 
|
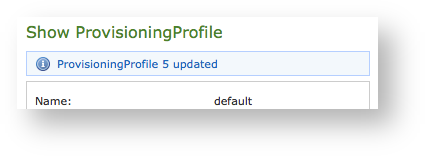
Edit a provisioning profileFrom the Provisioning Profile list, choose the profile you need to edit and click on it with your mouse. the "Show Provisioning Profile" page will appear (see | Xref |
|---|
| AnchorName | new provisioning profile created |
|---|
|
).Press the "Edit" button. | Subtitle |
|---|
| Prefix | figure |
|---|
| SubtitleText | Provisioning Profile edit form |
|---|
| AnchorName | Provisioning Profile edit form |
|---|
| 
|
Change the fields you need to and when you're done press the "Update" button at the bottom of the form to save the changes. Delete a Provisioning ProfileBy the very same form shown above in | Xref |
|---|
| AnchorName | new provisioning profile created |
|---|
|
you can also delete your Provisioning Profile.You have to click on the "Delete" button and Confirm the operation by clicking "Ok" in the warning pop-up window. The Profile should be gone. |