Click on the New Sip Trunk to go to the Edit Sip Trunk page:.
| Subtitle | ||||||
|---|---|---|---|---|---|---|
| ||||||
|

In
| Tip |
|---|
There are two types of trunk that you can create, depending on the authentication type:
|
The fields have to be configured as follows:
| Xref | ||
|---|---|---|
|
- NAME: a meaningful name for this trunk
- HOST: IP address/hostname of the SIP server provided by ITSP
- OUTBOUND PROXY: IP address of the outbound proxy server provided by ITSP
- VIRTUAL PHONE NUMBER: associated virtual number
- USERNAME: login username
- PASSWORD: password for the username entered above
- PORT: registration port of the service
- REGISTER: select if you want to have only outgoing calls or incoming (see below for deeper explanation)
- CONCURRENT CALLS: maximum number of calls on a single trunk
- NAT: enable/disable the Network Address Translation configuration
- DIRECTMEDIA: experimental sound management in P2P mode without routing the audio stream through the server
- SENDRPID: the Remote Party ID, used to interconnect with VoIP Provider for the management of privacy
- DTMFMODE: tone signaling technology used for this SIP interconnection
- ALLOW: voice codecs used in this trunk
- DISALLOW: voice codecs denied in this trunk
| Tip |
|---|
The called number in inbound calls passing through the trunk should match the number of an internal account or a virtual phone number associated with an account. This way the correct SIP phone will ring. |
The default values for Port, Allow and Disallow are usually work well, however feel free to change them to suite your needs better.
Mandatory fields are:
- Host
- Port
- Allow/Disallow
Register option
If the trunk is going to be also used for OUTBOUND calls (external calls) you need to be sure that the "Register" checkbox is checked. In this case the "Name" and "Secret" fields are mandatory as well. Otherwise you can uncheck the "Register" checkbox so the above fields will become optional.
Fill out the fields accordingly to the guidelines above and when you are done click on the "Update" icon at the bottom of the page.
| Subtitle | ||||||
|---|---|---|---|---|---|---|
| ||||||
|
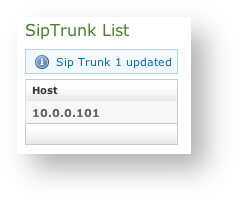
You can get back to the "Sip Trunk List" page where the Sip Trunk table is now filled based on your settings (
| Xref | ||
|---|---|---|
|
A notification will inform you about the progress of the operation. The number shown in the notification is an internal identifier in the database and thus can be ignored.
To check the entered data of the SIP Trunk click on the "Host" value into the table (for example in this case you should click on "10.0.0.101"). This will open again the Edit Sip Trunk page with the previously entered data.
2.2.2 Change Inbound Trunk settings
On the Edit Sip Trunk page you can change the values of the Inbound Trunk fields. When you are done commit the changes by clicking on the Update icon.Click again on the "Host" value and verify the values of the fields are actually changed
- PORT: this is 5060 by RFC
- TRANSPORT: UDP
- ENCRYPTION: disabled (unchecked)
We do also suggest the following values to be set:
- AUDIO TONES: ON EARLY MEDIA works fine with the Cisco Unified Communications Manager.
- DTMFMODE: choose your values considering the PBX on the other end of the Trunk. Usually we suggest to choose the value RFC2833
- DIRECTMEDIA: enabled (checked)
- SENDRPID: enabled (checked)
Other fields in the form depend by your network topology and by the features on the other end PBX.
When you are done with your changes, commit them by clicking on the Update icon.
| Navbar |
|---|