| Table of Contents |
|---|
Disable WiFi and use 3G connection
Android 2.2 and above
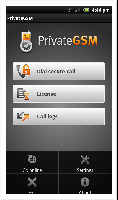
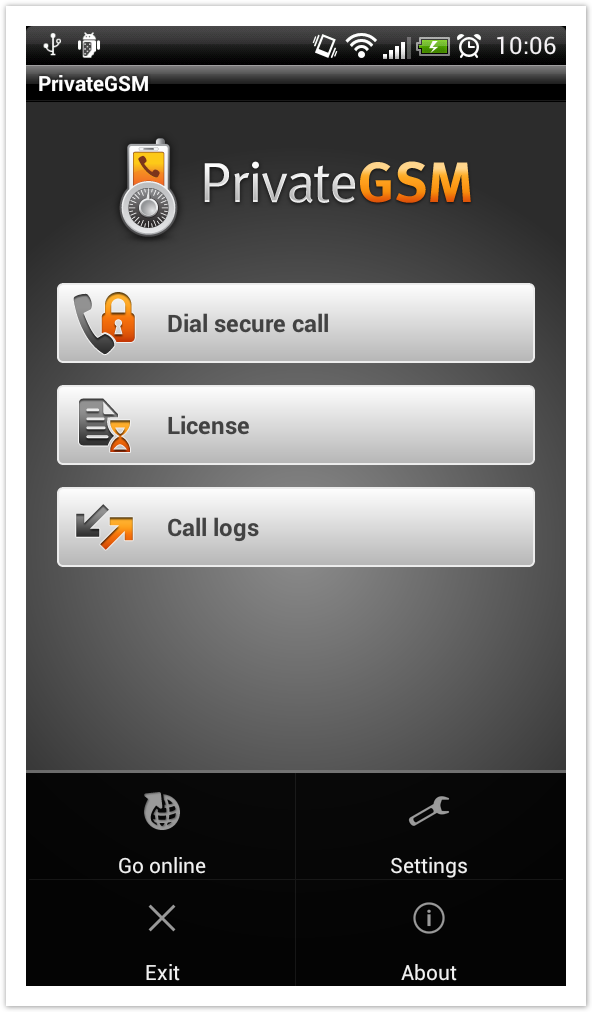
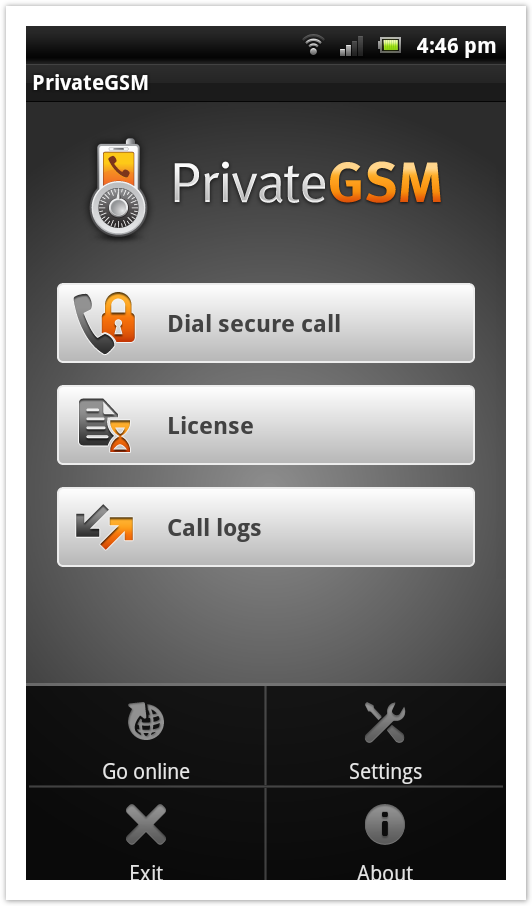
Open PrivateGSM and select "go offline" from the application menu, then select "Exit". (Fig. 1)
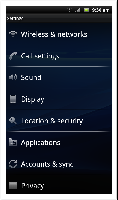
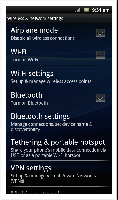
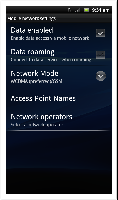
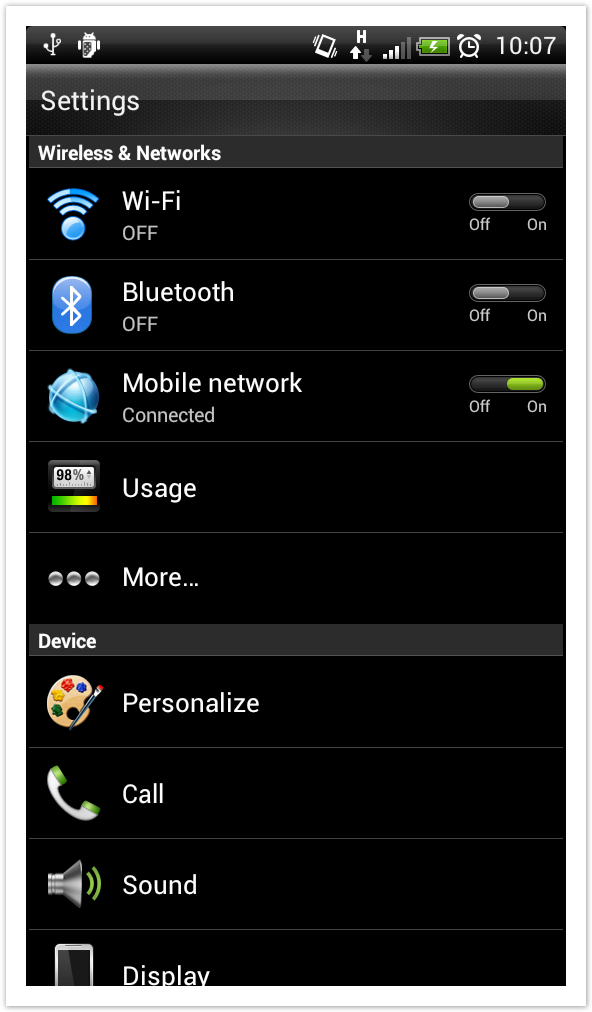
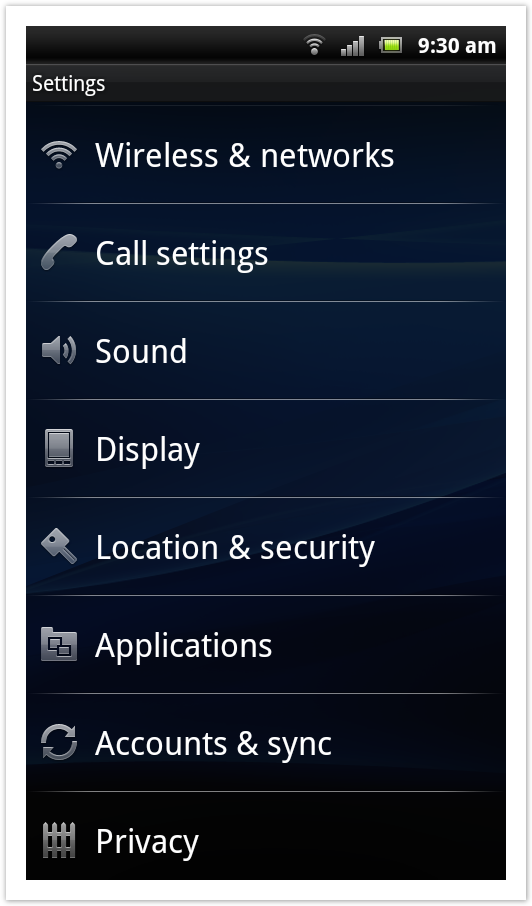
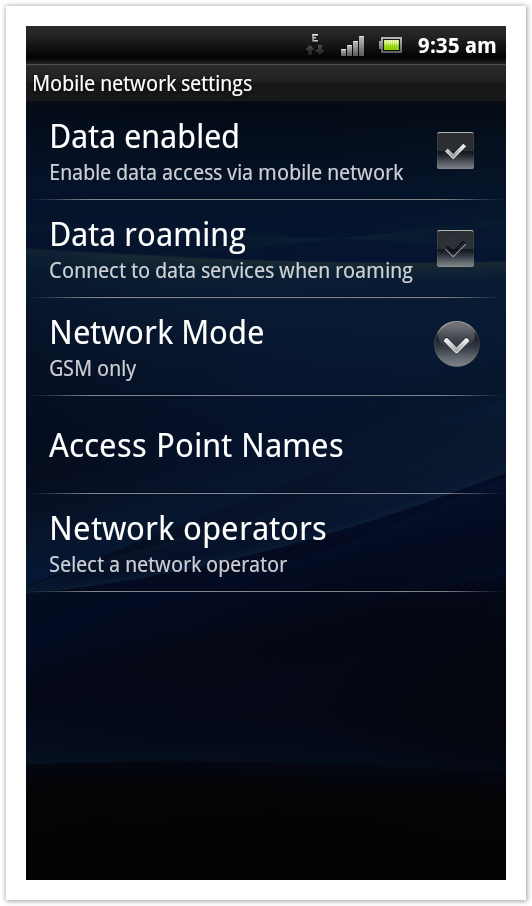
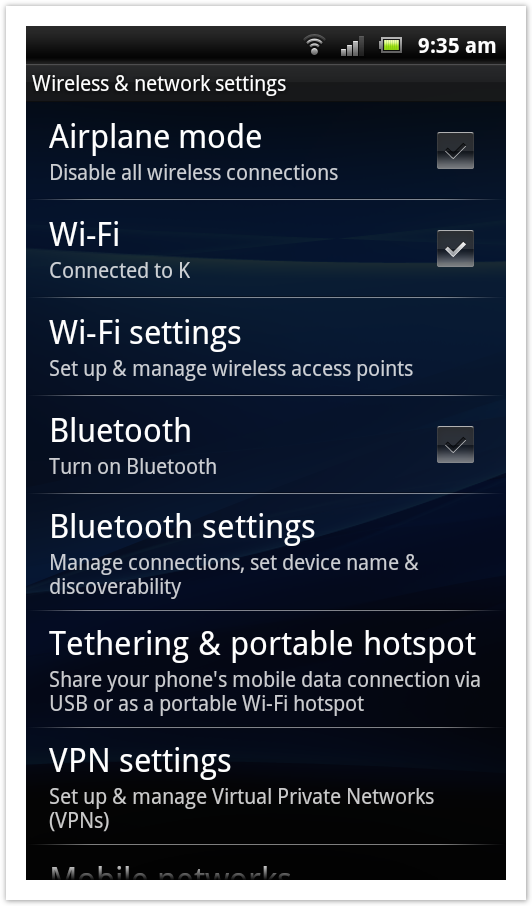
Open the phone settings → Wireless & networks (Fig. 2) → Remove the check near the "Wi-Fi" entry (Fig. 3). Check under "Mobile Networks" that the mobile network preferred mode is set to 3G (or WCDMA). (Fig. 4)
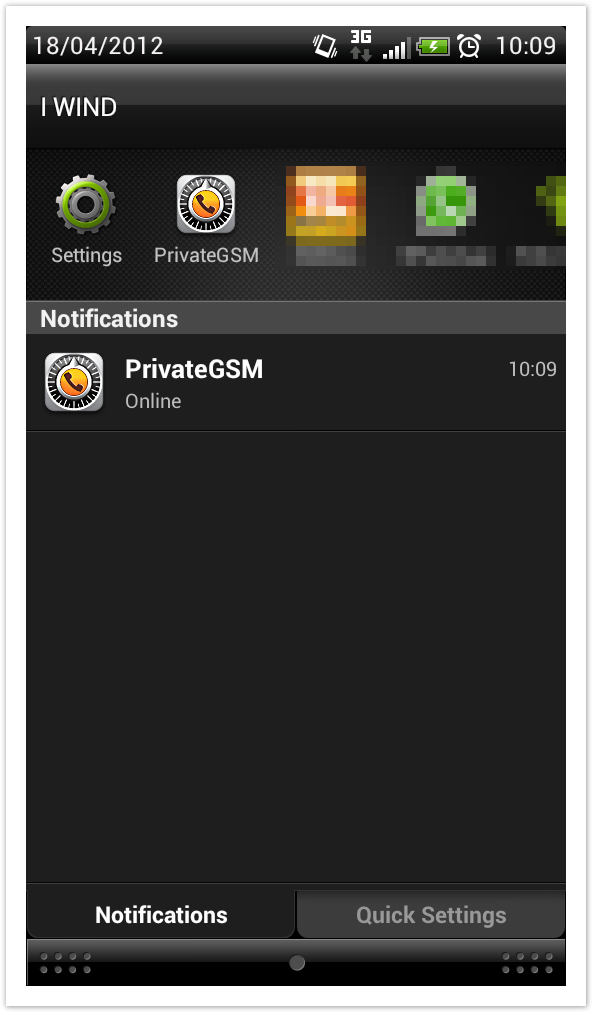
Re-launch PrivateGSM and see if it will connect to the server with 3G connection. Open the notification area and check that PrivateGSM notification says "Online" (Fig. 5)
 |  |
|---|---|
| Fig. 1 | Fig. 2 |
 |  |
| Fig. 3 | Fig. 4 |
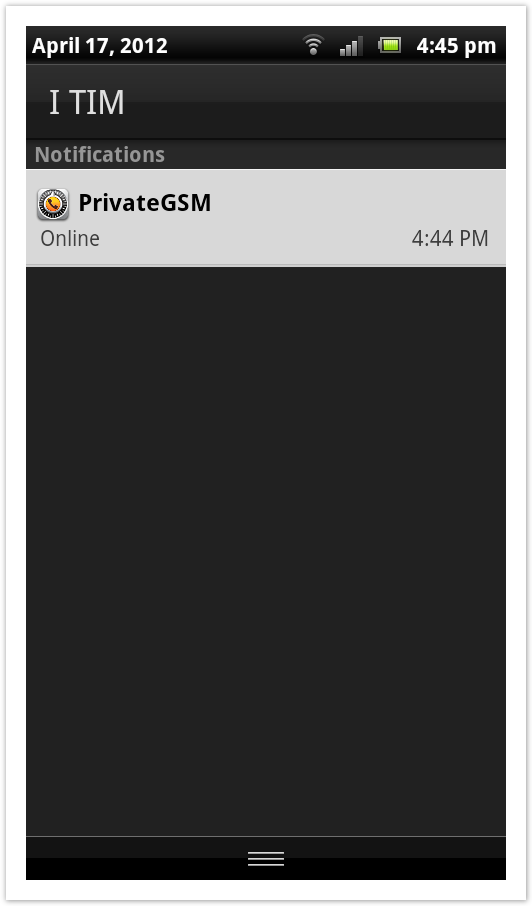 | |
| Fig. 5 |
Android 4.x
Open PrivateGSM and select "go offline" from the application menu, then select "Exit". (Fig. 1)
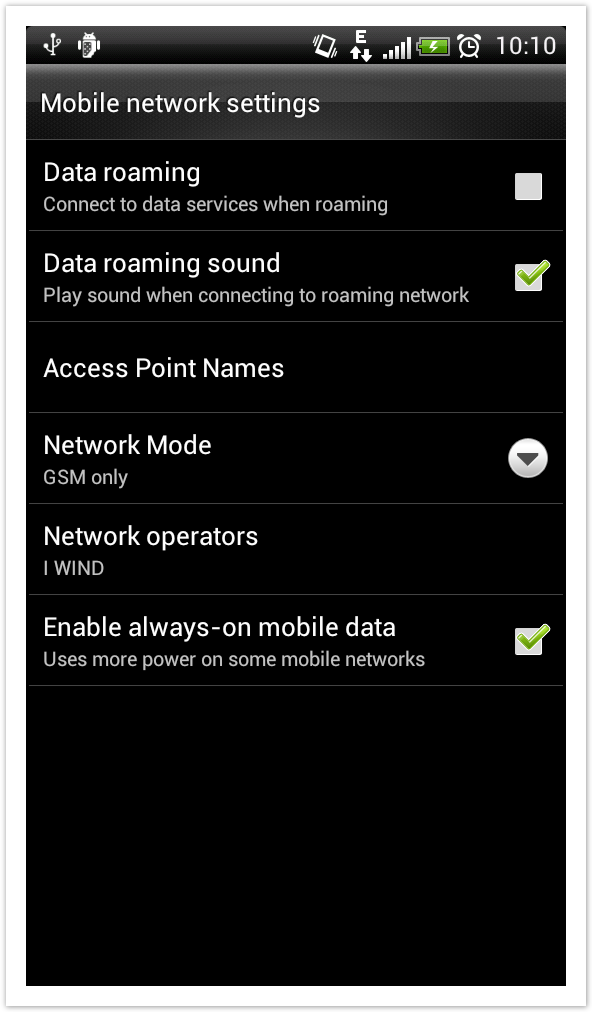
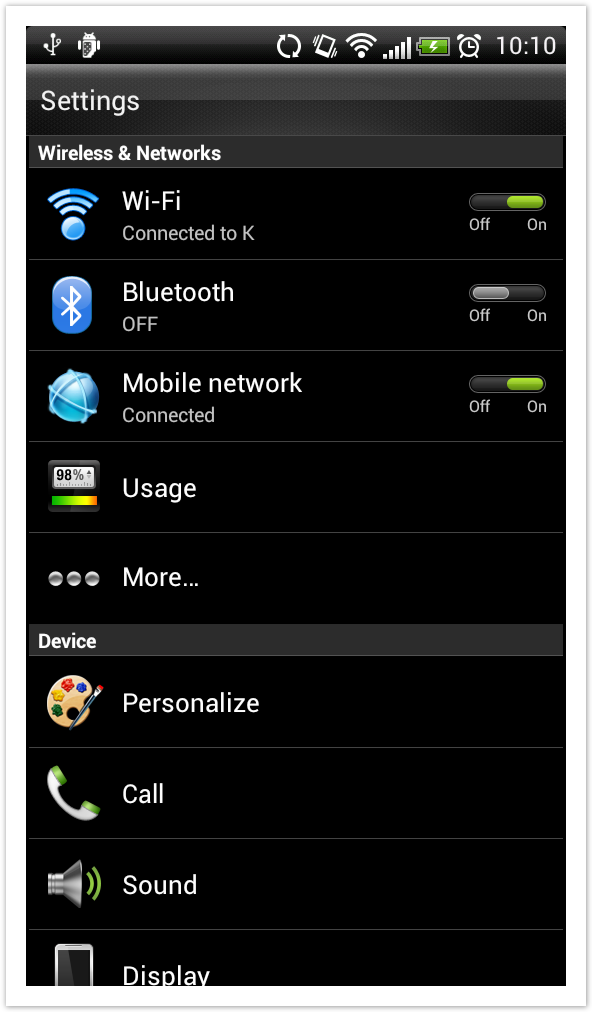
Open the phone settings → power off WiFi (Fig. 2). Tap "Mobile Network" and check uthat the mobile network preferred mode is set to 3G (or WCDMA). (Fig. 3)
Re-launch PrivateGSM and see if it will connect to the server with 3G connection. Open the notification area and check that PrivateGSM notification says "Online" (Fig. 4)
 |  |
|---|---|
| Fig. 1 | Fig. 2 |
 |  |
| Fig. 3 | Fig. 4 |
Disable WiFi and use 2G connection
Android 2.2 and above
Open PrivateGSM and select "go offline" from the application menu, then select "Exit".
Open the phone settings → Wireless & networks (Fig. 2) → Remove the check near the "Wi-Fi" entry (Fig. 3) . Check under "Mobile Networks" that the mobile network preferred mode is set to 2G (or GSM). (Fig. 4)
Re-launch PrivateGSM and see if it will connect to the server with 2G connection. Open the notification area and check that PrivateGSM notification says "Online" (Fig. 5)
 |  |
|---|---|
| Fig. 1 | Fig. 2 |
 |  |
| Fig. 3 | Fig. 4 |
| |
| Fig. 5 |
Android 4.x
Open PrivateGSM and select "go offline" from the application menu, then select "Exit". (Fig. 1)
Open the phone settings → power off WiFi (Fig. 2). Tap "Mobile Network" and check uthat the mobile network preferred mode is set to 2G (or GSM). (Fig. 3)
Re-launch PrivateGSM and see if it will connect to the server with 3G connection. Open the notification area and check that PrivateGSM notification says "Online" (Fig. 4)
| |
|---|---|
| Fig. 1 | Fig. 2 |
 | |
| Fig. 3 | Fig. 4 |
Enable WiFi instead of 3G/2G connection
Android 2.2 and above
Open PrivateGSM and select "go offline" from the application menu, then select "Exit". (Fig. 1)
Open the phone settings → Wireless & networks (Fig. 2) → Check near the "Wi-Fi" entry. If no WiFi network is configured on the device, configure a new WiFi connection under "Wi-Fi settings" (Fig. 3)
Re-launch PrivateGSM and see if it will connect to the server with WiFi connection. Open the notification area and check that PrivateGSM notification says "Online" (Fig. 4)
| |
|---|---|
| Fig. 1 | Fig. 2 |
 | |
| Fig. 3 | Fig. 4 |
Android 4.x
Open PrivateGSM and select "go offline" from the application menu, then select "Exit". (Fig. 1)
Open the phone settings → power on WiFi (Fig 2). If no WiFi network is configured on the device, configure a new WiFi connection. Tap "Wi-Fi" and add a new Wi-Fi network
Re-launch PrivateGSM and see if it will connect to the server with 3G connection. Open the notification area and check that PrivateGSM notification says "Online" (Fig. 3)
|  |
|---|---|
| Fig. 1 | Fig. 2 |
| |
| Fig. 3 |